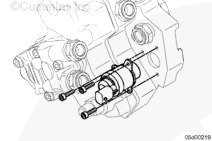
Do not pause more than 2 minutes between torque steps 1 and 2. This can cause the capscrews not to maintain their torque value. Leakage or engine damage can result.
Lubricate the o-ring with clean oil before installation.
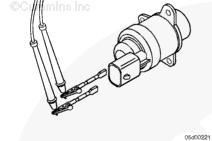
Fully press the fuel pump actuator into the fuel pump housing, use a slight twisting motion. Do this before starting the capscrews.
NOTE: Fully installing the fuel pump actuator prior to starting the capscrews reduces the risk of side loading the plunger and reduced component life.
NOTE: Be sure the fuel pump actuator flange is flush with the mounting surface on the fuel pump before tightening the capscrews.
Hello, I'm Jack, a diesel engine fan and a blogger. I write about how to fix and improve diesel engines, from cars to trucks to generators. I also review the newest models and innovations in the diesel market. If you are interested in learning more about diesel engines, check out my blog and leave your feedback.
View all posts by Jack

 WARNING


 CAUTION


;)
;)
;)
;)
;)
;)
;)
;)
;)
;)