Wear appropriate eye and face protection when using wire brushes to remove carbon from the cylinder block. Flying debris and dirt can cause personal injury. Also, make sure the wire brush is rated for the rpm being used if the brush is motor driven.
CAUTION
Do not use abrasive paper to remove the carbon ring. Small particles of abrasive material will cause severe engine damage.
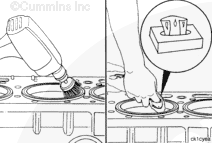
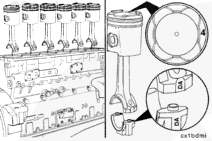
Plug the overhead oil rifle push tube cavities and coolant passages in the cylinder block, and use a rotary wire brush to remove the carbon ring from the top of the cylinder liner. Use a scraper that has an aluminum blade, if a rotary wire brush is not available.
Use lint-free paper to remove all the broken wire bristles and loose carbon from the cylinders.
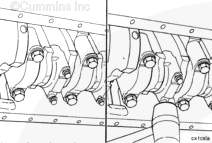
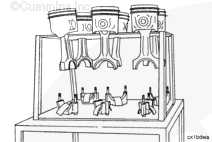
Install two connecting rod guide pins, Part Number 3375601.
Use a mallet to push the rod away from the crankshaft.
NOTE: Push the connecting rod away from the crankshaft, cover the crankshaft rod journal, and push the connecting rod until the piston rings are outside of the top of the cylinder liner.
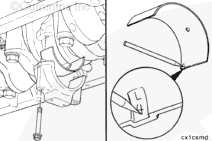
NOTE: The piston crown, skirt, and the connecting rod assemblies must be installed in the same cylinder number they were removed from to make sure proper fit of worn mating surfaces, if parts are used again. Also, the piston skirt and crown must be reinstalled together.
Use a tag to mark the cylinder number that each piston and connecting rod assembly was removed from. Make sure to mark both the skirt and crown on the piston.
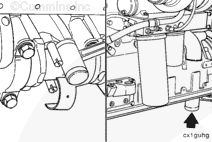
NOTE: The piston crown must have the cylinder numbers stamped on the piston top toward the camshaft side of the engine. The skirt must also be stamped so it can be matched with the piston crown.
Hello, I'm Jack, a diesel engine fan and a blogger. I write about how to fix and improve diesel engines, from cars to trucks to generators. I also review the newest models and innovations in the diesel market. If you are interested in learning more about diesel engines, check out my blog and leave your feedback.
View all posts by Jack

 WARNING
  CAUTION


;)
;)
;)
;)
;)
;)
;)
;)
;)
;)
;)
;)
;)
;)
;)
;)