View Related Topic
Install
TOC
WARNING
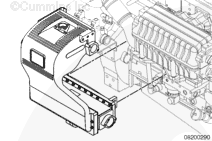
This component or assembly weighs greater than 23 kg [50 lb]. To prevent serious personal injury, be sure to have assistance or use appropriate lifting equipment to lift this component or assembly.
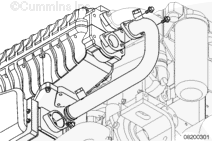
Install the heat exchanger and expansion tank assembly onto the engine.
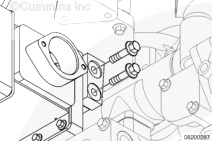
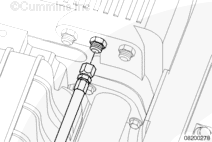
Install the two mounting capscrews to the upper heat exchanger mounting bracket.
Hand tighten all the capscrews once the heat exchanger assembly is in place.
Tighten the capscrews in the following sequence:
Front mounting capscrews
Lower mounting capscrews
Top mounting capscrews
Torque Value: 44 n.m [32 ft-lb]
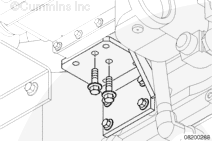
If the upper and lower mounting brackets where loosened to gain the heat exchanger alignment, tighten them to the following torque specifications.
Upper Bracket Capscrews
30 n.m
[22 ft-lb]
Lower Bracket Capscrews
44 n.m
[32 ft-lb]
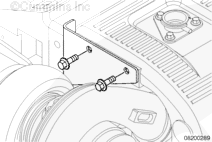
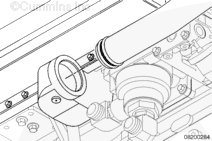
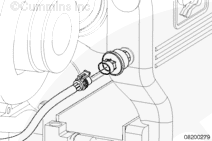
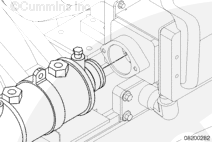
Verify the o-ring is still in place.
Install the flanged end of the tube and two capscrews to the coolant water pump inlet.
Torque Value: 44 n.m [32 ft-lb]
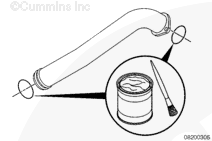
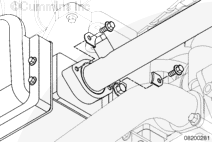
Use Lubriplate™ paste on the o-ring and install it in the groove on the coolant return tube flange.
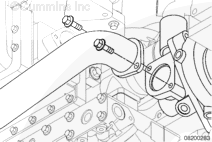
Install the coolant return tube to the expansion tank.
Tighten the hose clamps and capscrews.
Tube to Expansion Tank Capscrews
24 n.m
[212 in-lb]
Hose Clamps
8 n.m
[71 in-lb]
Install the coolant vent line.
Torque Value: 15 n.m [133 in-lb]
Use Lubriplate™ paste on the o-rings and install them on each end of the sea water tube.
Install the lower sea water tube.
Install the 2 capscrews to the flanged end on the sea water coolant tube to the aftercooler.
Tighten the capscrews evenly to be sure the flat face of the flange mates evenly to the aftercooler.
Sea Water Tube to Expansion tank Capscrews
24 n.m
[212 in-lb]
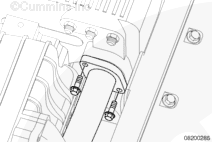
Install the two clamps and capscrews to both sides of the heat exchanger sea water inlet connection.
Tighten the capscrews.
Sea Water Tube to Heat Exchanger Clamp Capscrews
24 n.m
[212 in-lb]
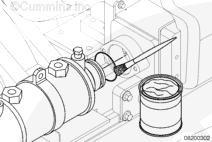
Insert the marine gear oil cooler (end with o-ring) into the heat exchanger core.
Insert the marine gear oil cooler in as far as possible, then back it out as needed to secure the bracket.
Install and tighten the 2 capscrews.
Torque Value: 44 n.m [32 ft-lb]
Last Modified: 08-May-2008
Published by Jack
Hello, I'm Jack, a diesel engine fan and a blogger. I write about how to fix and improve diesel engines, from cars to trucks to generators. I also review the newest models and innovations in the diesel market. If you are interested in learning more about diesel engines, check out my blog and leave your feedback.
View all posts by Jack
 WARNING


;)
;)
;)
;)
;)
;)
;)
;)
;)
;)
;)
;)
;)
;)
;)
;)
;)
;)
;)
;)
;)
;)
;)
;)
;)
;)
;)
;)
;)
;)