When using solvents, acids, or alkaline materials for cleaning, follow the manufacturer’s recommendations for use. Wear goggles and protective clothing to reduce the possibility of personal injury.
WARNING
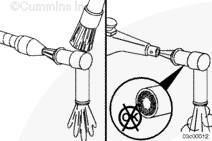
Wear appropriate eye and face protection when using compressed air. Flying debris and dirt can cause personal injury.
Use solvent to clean the inside of the crankcase breather tube, and dry with compressed air.
Two p-clips attach the vent hose to the gear housing and two p-clips attach the vent hose to the side of the block. With the breather hose installed on the new cover, the hose (3) must extend lower than the flywheel housing.
Install the crankcase vent hose (1). Use the four p-clips (2), to secure the crankcase vent hose to the engine.
Connect the inlet and outlet rubber hoses, oil drain line, and install the three hose clamps to the housing. Be sure to push the hose on until it stops on the housing connector. Verify that the hose clears the fan blade.
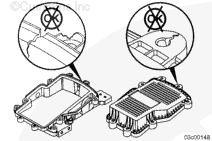
Connect the breather sensor wiring connector to the breather sensor.
Install and tighten the four mounting capscrews.
M10
47 n.m
[35 ft-lb]
M8
20 n.m
[15 ft-lb]
Remove and install the crankcase pressure sensor. Refer to Procedure 019-445 in the Troubleshooting and Repair CM871 and CM876 Electronic Control System, ISX and ISM Engines, Bulletin 4021560.
Hello, I'm Jack, a diesel engine fan and a blogger. I write about how to fix and improve diesel engines, from cars to trucks to generators. I also review the newest models and innovations in the diesel market. If you are interested in learning more about diesel engines, check out my blog and leave your feedback.
View all posts by Jack


 WARNING


;)
;)
;)
;)
;)
;)
;)
;)
;)
;)
;)
;)
;)
;)
;)
;)
;)
;)
;)
;)