View Related Topic
Remove
TOC
Remove the breather tube assembly from the seal carrier.
Remove the breather oil seal (1) from the upper gear cover.
Clean and Inspect for Reuse
TOC
Clean and inspect the crankcase breather for reuse.
If the filter element is plugged, replace the filter element.
Install
TOC
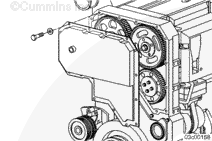
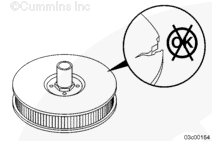
Position the crankcase breather over the spacer.
Pre-start the four crankcase breather capscrews.
Torque the capscrews in a crisscross pattern.
Torque Value: 45 n.m [33 ft-lb]
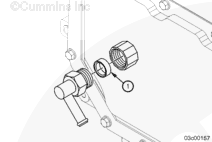
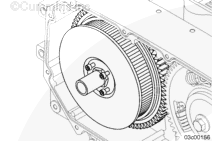
Install the oil seal into the seal carrier.
The groove side (1)must be installed toward the engine.
Make sure the seal carrier is tight in the front cover. If not, tighten the seal carrier.
Torque Value: 20 n.m [177 in-lb]
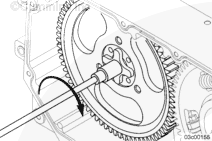
Install the breather tube assembly into the seal carrier. Torque to the breather tube assembly.
Torque Value: 20 n.m [15 ft-lb]
Finishing Steps
TOC
Operate the engine until it reaches normal operating temperature and check for leaks.
Last Modified: 25-Jul-2008
Published by Jack
Hello, I'm Jack, a diesel engine fan and a blogger. I write about how to fix and improve diesel engines, from cars to trucks to generators. I also review the newest models and innovations in the diesel market. If you are interested in learning more about diesel engines, check out my blog and leave your feedback.
View all posts by Jack


;)
;)
;)
;)
;)
;)
;)
;)
;)
;)
;)
;)
;)
;)
;)
;)