Batteries can emit explosive gases. To reduce the possibility of personal injury, always ventilate the compartment before servicing the batteries. To reduce the possibility of arcing, remove the negative (-) battery cable first and attach the negative (-) battery cable last.
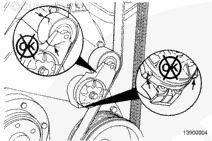
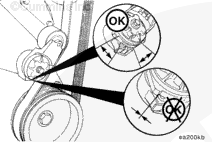
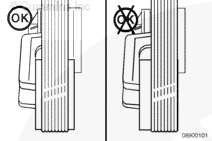
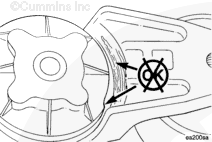
Measure the clearance between the tensioner spring casing and the tensioner arm to verify tensioner wear-out and uneven bearing wear.
If the clearance exceeds 3 mm [0.12 in] at any point, the tensioner must be replaced as a complete assembly.
Tensioners usually show a larger clearance gap near the lower portion of the spring casing, resulting in the upper portion rubbing against the tensioner arm. Always replace the belt when a tensioner is replaced.
Batteries can emit explosive gases. To reduce the possibility of personal injury, always ventilate the compartment before servicing the batteries. To reduce the possibility of arcing, remove the negative (-) battery cable first and attach the negative (-) battery cable last.
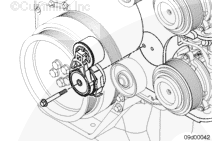
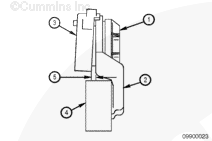
Lift and hold the tensioner, use a 3/8-inch square drive.
Hello, I'm Jack, a diesel engine fan and a blogger. I write about how to fix and improve diesel engines, from cars to trucks to generators. I also review the newest models and innovations in the diesel market. If you are interested in learning more about diesel engines, check out my blog and leave your feedback.
View all posts by Jack

 WARNING


;)
;)
;)
;)
;)
;)
;)
;)
;)
;)
;)
;)
;)
;)