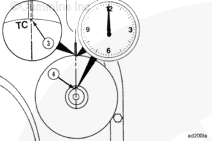
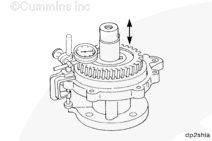
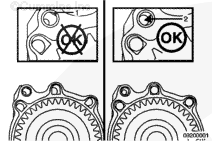
When the timing mark is visible through the inspection hole, cylinders No. one and six are at top dead center. The accessory drive pulley T-C mark
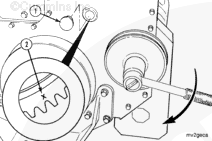
(3) and keyway (4) are at the 12-o’clock location.
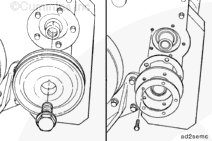
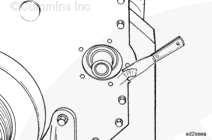
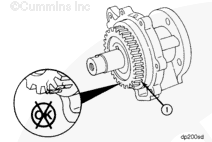
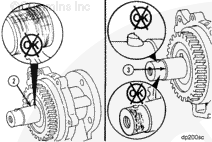
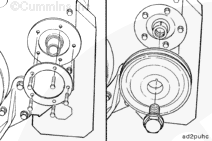
Visually inspect the shaft surface (2). Pay special attention to the pulley hub to shaft shoulder contact area (3). Replace the shaft if scratches, scoring, or fretting is found.
Inspect the dowel pin for damage. Replace if required.
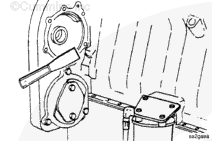
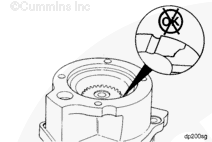
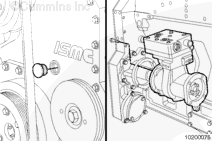
Care must be used when installing the accessory drive gasket. If the gasket is twisted during the installation of the accessory drive, a leak path (1) will exist between the gasket and the oil passage port at point (2).
Use a small amount of grease or sealant to hold the gasket in place during installation. Use care
must be at the 12 o’clock location when the accessory drive is installed. Make sure the camshaft gear timing mark “X” is visible through the inspection hole in the front
of the gear cover.
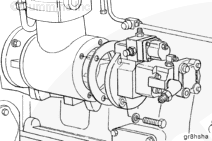
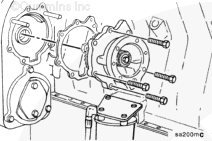
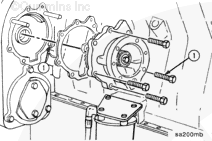
Use a new gasket to install the accessory drive assembly.
Install the six capscrews and tighten.
Torque Value: 47 n.m [35 ft-lb]
NOTE: The capscrew (1) located in the lower corner nearest the cylinder block
must be installed with a new copper sealing washer, Part No. 3882885,
and thread sealant, Part No. 3823494, applied to the threads.
Hello, I'm Jack, a diesel engine fan and a blogger. I write about how to fix and improve diesel engines, from cars to trucks to generators. I also review the newest models and innovations in the diesel market. If you are interested in learning more about diesel engines, check out my blog and leave your feedback.
View all posts by Jack


 CAUTION


;)
;)
;)
;)
;)
;)
;)
;)
;)
;)
;)
;)
;)
;)
;)
;)
;)
;)
;)
;)
;)
;)
;)
;)
;)
;)
;)
;)
;)
;)
;)
;)