Remove
TOC
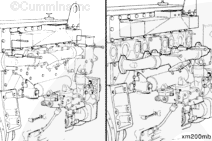
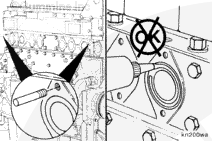
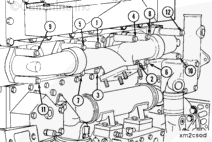
Remove two upper capscrews from the end sections of the exhaust manifold
Remove the remaining capscrews, exhaust manifold assembly and gaskets.
Clean
TOC
WARNING
When using a steam cleaner, wear protective clothing, as well as safety glasses or a face shield. Hot steam can cause serious personal injury.
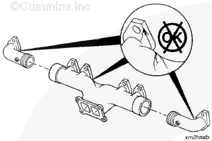
Use 240-grit emery cloth to remove carbon deposits from the sealing
Use steam to clean the exhaust manifold. Dry with compressed air.
Inspect for Reuse
TOC
Inspect the parts for cracks or damage.
NOTE : A charge air cooler failure can cause progressive damage to the exhaust Refer to Procedure 010-027.
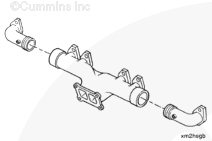
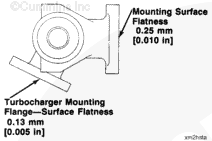
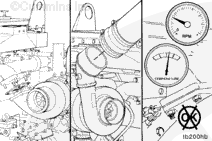
Inspect the mounting surfaces for flatness.
The exhaust manifold mounting surface
must be flat to within 0.25 mm [0.010 in]. The turbocharger mounting flange
must have
If these surfaces are
not within the flatness specifications, refer to L10 Alternative Repair Manual:
Bulletin No. 3810310.
Install
TOC
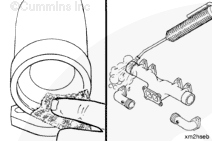
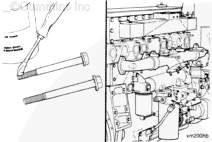
Install two guide studs, Part No. 3376488, in the two top end holes
Install a new gasket over each guide stud.
Do
not use any kind of adhesive to hold the gaskets.
To aid in future capscrew removal, apply a coating of high temperature
Install the exhaust manifold, tubular spacers, and capscrews.
NOTE : The exhaust manifold can be titled back enough to install a new gasket on each exhaust port as the capscrews are being installed.
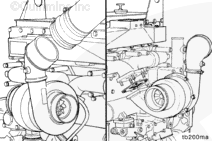
Install the turbocharger.
Refer to Procedure 010-033.
Install the air piping to the turbocharger. Refer to the manufacturer’s
Operate the engine to check for leaks.
Last Modified: 07-May-2003
Published by Jack
Hello, I'm Jack, a diesel engine fan and a blogger. I write about how to fix and improve diesel engines, from cars to trucks to generators. I also review the newest models and innovations in the diesel market. If you are interested in learning more about diesel engines, check out my blog and leave your feedback.
View all posts by Jack


 WARNING


;)
;)
;)
;)
;)
;)
;)
;)
;)
;)
;)
;)
;)
;)
;)
;)
;)
;)
;)
;)