M11 Series – Service Manual – 012-014   Air Compressor

Table of Contents

Remove
Inspect for Reuse
Install

Remove

TOC

 WARNING 

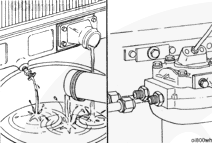
When using a steam cleaner, wear protective clothing and safety glasses or a face shield. Hot steam can cause serious personal injury.

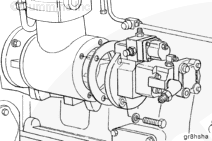
NOTE: The illustrations shown will be of the SS model single cylinder air compressor. Differences in procedures for SS, QE and ST model Cummins air compressors will be shown where necessary.

Use steam to clean the air compressor. Dry with compressed air.

Remove the fuel pump.

Refer to Procedure 005-016.

SMALL | MEDIUM | LARGE


Drain the engine coolant.

Refer to Procedure 008-018.

Remove the coolant lines from the air compressor.

SMALL | MEDIUM | LARGE


Remove the air connections from the air compressor.

Remove the air compressor support bracket and capscrews.

Remove the four capscrews, the air compressor, and splined coupling.

SMALL | MEDIUM | LARGE
   

Inspect for Reuse

TOC

Inspect the compressor housing for cracks or damage.

Inspect the splined coupling for cracks or damage.

SMALL | MEDIUM | LARGE
   

Install

TOC

Position the timing mark on the air compressor crankshaft at the 12:00 o’clock position.

Position the accessory drive shaft dowel pin at the 2:00 o’clock position as viewed from the front of the engine.

 
SMALL | MEDIUM | LARGE


Install the splined coupling on the accessory drive shaft.

Be sure the gasket surfaces of the accessory drive and air compressor are clean and

not damaged.

SMALL | MEDIUM | LARGE


Use a new gasket to install the air compressor and four capscrews to the accessory drive.

Torque Value:  68  n.m  [50 ft-lb]

Install the air compressor support bracket.

Torque Value:  47  n.m  [35 ft-lb]

SMALL | MEDIUM | LARGE


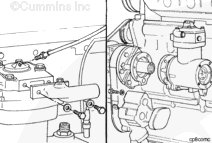
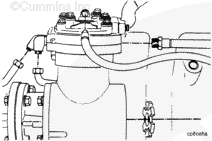
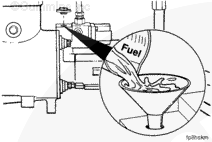
NOTE: If rubber grommets are used on the coolant lines, be sure they are installed carefully to prevent cuts or tears to the grommets which will cause coolant leaks. When flexible tubing is used make sure that it does

not
rub any other surfaces.

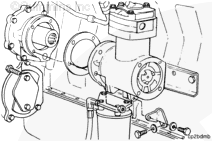
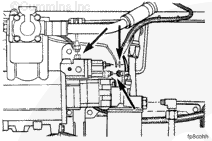
Install the coolant and air lines to the air compressor and tighten.

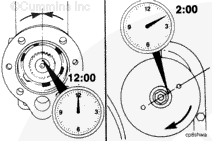
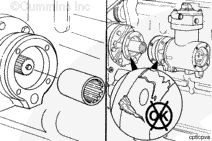
Install the fuel pump drive coupling on the air compressor.

SMALL | MEDIUM | LARGE


Be sure the gasket surfaces of the air compressor and fuel pump are clean and

not
damaged.

Use a new gasket when installing the fuel pump to the air compressor.

Install the fuel pump. Refer to Procedure

005-016-026.

SMALL | MEDIUM | LARGE


Install all fuel tubing to the fuel pump and tighten.

Connect the electrical wiring to the fuel pump.

SMALL | MEDIUM | LARGE


Whenever the fuel pump is removed, it is necessary to prime the pump after installing it on the engine to remove any trapped air.

NOTE: If the fuel pump is dirty, clean the outside of the pump.

Remove the filter cap from the top of the front support.

Fill the housing with clean fuel. Install and tighten the filter cap.

Torque Value:  18  n.m  [13 ft-lb]

SMALL | MEDIUM | LARGE


Fill the engine cooling system. Refer to Procedure

008-018-028.

Operate the engine and check for leaks.

SMALL | MEDIUM | LARGE
Last Modified:  07-May-2003