A camshaft gear removal/installation tool, Part Number 3823589, is available for replacing the camshaft gear in restricted areas where the camshaft can not be removed from the engine. Follow the directions included with the tool.
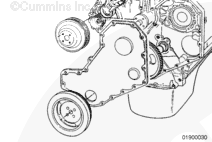
Remove the fan pulley. Refer to Procedure 008-039.
Remove the vibration damper. Refer to Procedure 001-052.
Remove the gear cover. Refer to Procedure 001-031.
When using solvents, acids, or alkaline materials for cleaning, follow the manufacturer’s recommendations for use. Wear goggles and protective clothing to reduce the possibility of personal injury.
WARNING
Wear appropriate eye and face protection when using compressed air. Flying debris and dirt can cause personal injury.
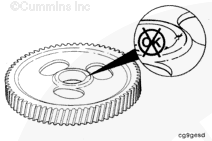
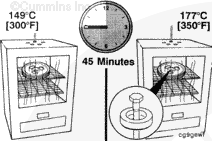
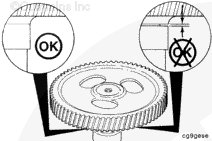
To reduce the possibility of engine damage, the timing marks and gear part numbers must be facing away from the camshaft when the gear is installed. Keep the camshaft in a vertical position with the gear up until the gear has cooled. Do not use water to reduce the cooling time. Using water can crack the gear.
NOTE: The gear must be installed within 30 minutes after it is removed from the oven.
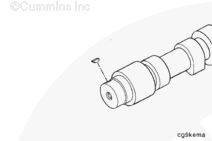
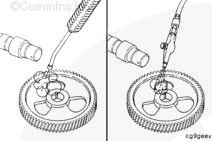
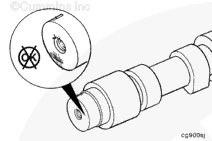
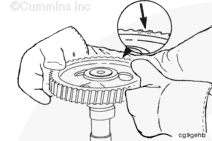
Remove the gear from the oven. Align the keyway in the gear with the dowel pin in the camshaft; install the gear on the camshaft. Make sure the gear is seated against the camshaft shoulder.
NOTE: Be sure the gear is seated against camshaft shoulder.
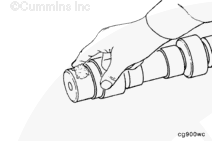
Using a 0.001-inch feeler gauge, check to see if the feeler gauge can be inserted between the camshaft gear and the shoulder on the camshaft. If the feeler gauge can be inserted, the camshaft gear is not properly seated.
Hello, I'm Jack, a diesel engine fan and a blogger. I write about how to fix and improve diesel engines, from cars to trucks to generators. I also review the newest models and innovations in the diesel market. If you are interested in learning more about diesel engines, check out my blog and leave your feedback.
View all posts by Jack


 CAUTION
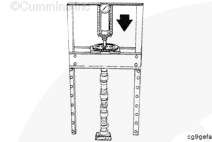
 WARNING


;)
;)
;)
;)
;)
;)
;)
;)
;)
;)
;)
;)
;)
;)
;)
;)
;)
;)
;)
;)
;)
;)
;)
;)
;)
;)