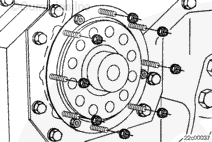
Position the replacer plate (1) over the crankshaft end and against the crankshaft seal. The large notch between the teeth needs to bridge the raised gear cover surface.
Make certain that the alignment of the three welded nuts on the crankshaft seal are positioned into the counterbore slots of the replacer plate (1).
Install a capscrew (4) with a flat washer (5) in the upper slot of the replacer plate to hold it in position
Tighten the capscrews by hand until a slight resistance is felt. Do not overtighten the capscrews or the seal nuts can break off causing damage to the seal and leading to front cover damage.
Use a small allen wrench to thread the removal tool capscrews (2) through the replacer plate and into the seal nuts.
Tighten the socket head capscrews (2) clockwise into the three seal removal nuts that are welded on the crankshaft seal until a slight resistance is felt.
Remove the capscrew in the upper slot of the replacer plate (1).
Hello, I'm Jack, a diesel engine fan and a blogger. I write about how to fix and improve diesel engines, from cars to trucks to generators. I also review the newest models and innovations in the diesel market. If you are interested in learning more about diesel engines, check out my blog and leave your feedback.
View all posts by Jack


 CAUTION
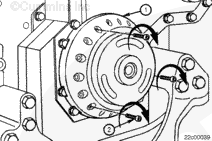

;)
;)
;)
;)
;)
;)
;)
;)