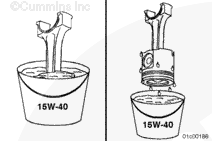
Use a clean, lint-free cloth to clean the connecting rods and bearing shells.
Do not lubricate the backside of the bearing shells. The operating clearance of the bearing will be reduced and the bearing can be damaged during engine operation.
Use the compressor drive or barring device to rotate the crankshaft so the connecting rod journal of the connecting rod being installed is at bottom dead center.
Failure to align the deep valve pocket and the piston skirt cooling nozzle notch correctly will result in extensive engine damage.
Align the piston crown deep valve pocket on the exhaust side of the engine, and the piston skirt cooling nozzle notch to the intake side of the engine.
If the deep valve pocket and the piston skirt cooling nozzle notch are not on opposite sides, the piston and connecting rod assembly are not assembled correctly. Disassemble the piston and connecting rod and assemble correctly.
Insert the connecting rod through the cylinder liner until the ring compressor contacts the top of the liner.
Both articulated pistons and single-piece pistons have an arrow on the top of the piston crown, which will point to the front of the engine, when the piston is installed properly.
Do not use a metal drift to push the piston into the cylinder liner. The piston rings or cylinder liner can be damaged.
Hold the ring compressor against the cylinder liner. Push the piston through the ring compressor and into the cylinder liner. Push the piston until the top ring is completely in the cylinder liner.
If the piston does not move freely, remove the piston and inspect for broken or damaged rings.
Hello, I'm Jack, a diesel engine fan and a blogger. I write about how to fix and improve diesel engines, from cars to trucks to generators. I also review the newest models and innovations in the diesel market. If you are interested in learning more about diesel engines, check out my blog and leave your feedback.
View all posts by Jack




 CAUTION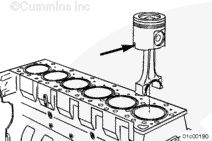


;)
;)
;)
;)
;)
;)
;)
;)
;)
;)
;)
;)
;)
;)
;)
;)
;)
;)
;)
;)