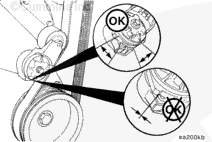
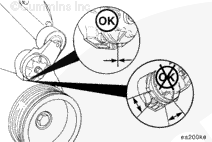
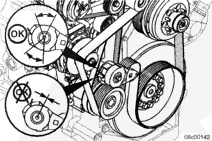
With the engine turned off and with the water pump/fan belt installed, check that neither the top nor bottom tensioner arm stop is touching the cast boss on the tensioner body. If either of the stops is touching a boss, the water pump/fan belt must be replaced. Check to make sure the correct belt part number is being used if either condition exists.
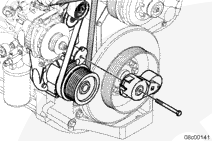
Using a ½ inch square drive, lift belt tensioner to relieve tension on the belt.
Remove the water pump/fan belt.
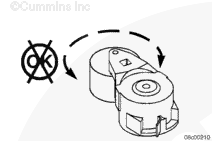
The belt tensioner is spring-loaded and must be pivoted away from the drive belt. Pivoting in the wrong direction can result in damage to the belt tensioner.
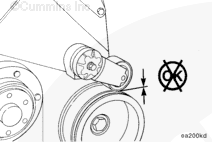
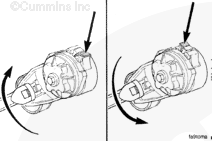
If the tensioner pulley touches the accessory drive pulley after the tensioner has been fully relaxed, the bottom tensioner arm stop boss has broken and the tensioner must be replaced.
The belt tensioner is spring loaded and must be pivoted away from the drive belt. Pivoting in the wrong direction can result in damage to the belt tensioner or personal injury.
Remove the cooling fan belt. Refer to Procedure 008-002.
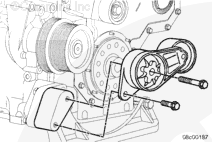
Remove the belt tensioner mounting capscrew and the belt tensioner from the bracket.
The mid-mount aluminum belt tensioner/idler bracket is part of the water pump removal and installation because of common capscrew usage. Refer to Procedure 008-062.
The belt tensioner is spring loaded. Do not attempt to disassemble the tensioner. Severe personal injury can result.
WARNING
When using solvents, acids or alkaline materials for cleaning, follow the manufacturers recommendations for use. Wear goggles and protective clothing to reduce the possibility of personal injury.
Check the tensioner for dirt buildup. If the tensioner has dirt buildup, remove and clean with safety solvent.
Pivot the tensioner through the full range of motion. Tensioner must move with resistance while pivoting the tensioner down. If not, replace the tensioner.
Check and make sure the correct belt part number is being used.
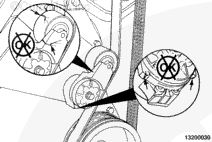
Inspect the tensioner for evidence of the pivoting tensioner arm contacting the stationary circular base. If there is evidence of these two areas contacting, the pivot tube bushing has failed and the tensioner must be replaced.
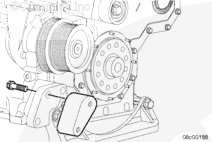
Install the belt tensioner mounting capscrew and the belt tensioner from the bracket.
The mid-mount aluminum belt tensioner/idler bracket is part of the water pump removal and installation due to common capscrew usage. Refer to Procedure 008-062.
The belt tensioner is spring loaded and must be pivoted away from the drive belt. Pivoting in the wrong direction can result in damage to the belt tensioner or personal injury.
Install the drive belt. Refer to Procedure 008-002.
Hello, I'm Jack, a diesel engine fan and a blogger. I write about how to fix and improve diesel engines, from cars to trucks to generators. I also review the newest models and innovations in the diesel market. If you are interested in learning more about diesel engines, check out my blog and leave your feedback.
View all posts by Jack


 CAUTION


 WARNING
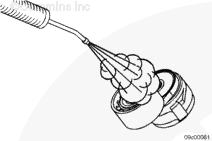


;)
;)
;)
;)
;)
;)
;)
;)
;)
;)
;)
;)
;)
;)
;)
;)
;)
;)
;)
;)
;)
;)
;)
;)
;)
;)
;)
;)
;)
;)
;)
;)
;)
;)