Batteries can emit explosive gases. To reduce the possibility of personal injury, always ventilate the compartment before servicing the batteries. To avoid arcing, remove the negative (-) battery cable first, and attach the negative (-) battery cable last.
Turn the keyswitch to the OFF position.
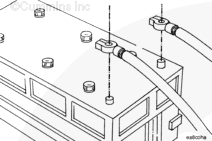
Disconnect the vehicle battery cables from the battery.
NOTE: Disconnecting the vehicle battery connections can require that the engine ECM real-time clock be reset using INSITE™.
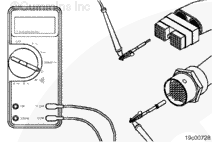
To reduce the possibility of pin and harness damage, use test leads, Part Number 3822758 and 3822917, when taking a measurement.
Verify that the neutral position switch, the hood tilt switch, and the parking brake switch are closed.
Disconnect the ICON™, idle control module starter relay from the OEM harness. Disconnect the 31-pin OEM connector. Disconnect the actuator harness connector from the ECM.
Touch one of the multimeter leads to pin 85 of the ICON™, idle control module starter relay harness connector, OEM harness side, or the equivalent pin on the OEM 31-pin connector side of the relay. Refer to the appropriate Signature/ISX Wiring Diagram.
Touch the other multimeter lead to pin 27 of the 31-pin OEM connector, OEM harness side.
Verify that the 6-pin ICON™, idle control module , idle control module, shorting plug is installed.
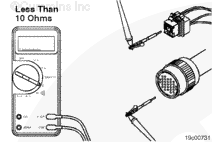
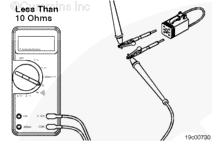
Touch the multimeter lead to pin 27 of the 31-pin OEM connector, engine harness side. Touch the other multimeter lead to pin 14 of the actuator harness connector. Read the value displayed on the multimeter.
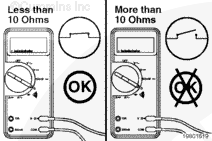
The multimeter must display a reading of less than 10 ohms, which is a closed circuit.
If the circuit is not closed, check the ICON™, idle control module shorting plug for continuity.
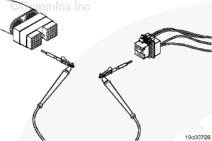
Disconnect the ICON™, idle control module shorting plug from the 6-pin engine harness connector.
Touch the multimeter lead to pin 5 of the ICON™, idle control module shorting plug. Touch the other multimeter lead to pin 4 of the ICON™, idle control module shorting plug. Read the value displayed on the multimeter.
The multimeter must display a reading of less than 10 ohms, which is a closed circuit. If the circuit is not closed, repair or replace the shorting plug. Refer to Procedure 019-206. If the circuit is closed, the problem is in the harness. Repair or replace the OEM harness. Refer to Procedures 019-204 or 019-208 or 019-071.
Disconnect the OEM harness connector from the ECM.
Touch one of the multimeter leads to pin 33 of the 50-pin OEM harness connector, OEM harness side.
Touch the other multimeter lead to the corresponding pin in the ICON™, idle control module starter relay harness connector, OEM harness (nearest to ECM) side. Read the value displayed on the multimeter.
Touch the multimeter lead to pin 33 of the 50-pin OEM harness connector.
Touch the other multimeter lead to pin 20 of the 31-pin OEM harness connector, OEM side.
The multimeter must display a reading of less than 10 ohms, which is a closed circuit. If the circuit is not closed, repair or replace the OEM harness. Refer to Procedures 019-204 or 019-208 or 019-071.
Connect all components after completing the repair.
Hello, I'm Jack, a diesel engine fan and a blogger. I write about how to fix and improve diesel engines, from cars to trucks to generators. I also review the newest models and innovations in the diesel market. If you are interested in learning more about diesel engines, check out my blog and leave your feedback.
View all posts by Jack
 WARNING
 CAUTION
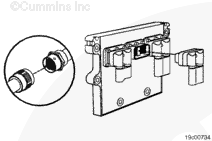


;)
;)
;)
;)
;)
;)
;)
;)
;)
;)
;)
;)
;)
;)