Batteries can emit explosive gases. To reduce the possibility of personal injury, always ventilate the compartment before servicing the batteries. To reduce the possibility of arcing, remove the negative (-) battery cable first and attach the negative (-) battery cable last.
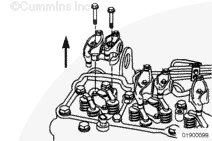
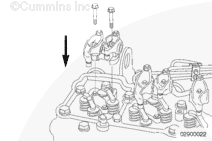
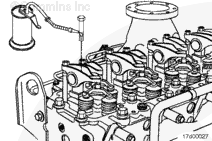
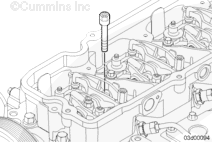
Remove the capscrews from the rocker lever pedestals.
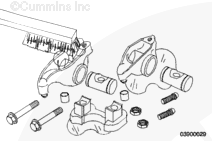
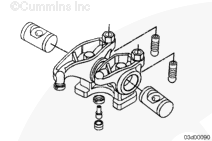
Remove and mark the pedestals and rocker lever assemblies one at a time as to their location and position.
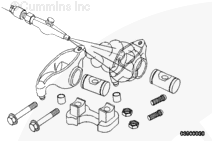
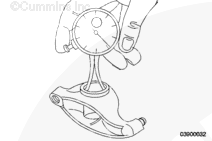
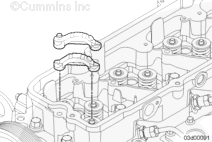
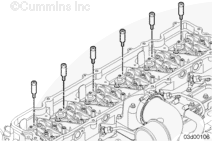
Remove and mark the crossheads one at a time as to their location and position. The crossheads and rocker assemblies must be installed in their original location and position.
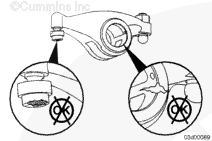
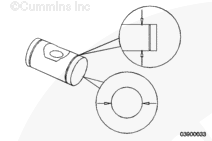
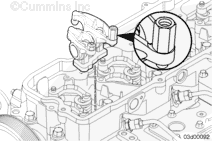
Different combinations of the adjusting screw, rocker lever shaft, rocker lever, and push rod can exist. Make sure when replacing rocker levers or adjusting screws that the correct part is being used.
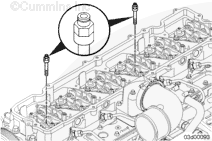
Different combinations of the adjusting screw, rocker lever shaft, rocker lever, and push rod can exist. Make sure when replacing rocker levers or adjusting screws that the correct part is being used.
Batteries can emit explosive gases. To reduce the possibility of personal injury, always ventilate the compartment before servicing the batteries. To reduce the possibility of arcing, remove the negative (-) battery cable first and attach the negative (-) battery cable last.
Hello, I'm Jack, a diesel engine fan and a blogger. I write about how to fix and improve diesel engines, from cars to trucks to generators. I also review the newest models and innovations in the diesel market. If you are interested in learning more about diesel engines, check out my blog and leave your feedback.
View all posts by Jack
 WARNING


;)
;)
;)
;)
;)
;)
;)
;)
;)
;)
;)
;)
;)
;)
;)
;)
;)
;)
;)
;)
;)
;)
;)
;)
;)
;)
;)
;)
;)
;)
;)
;)
;)
;)