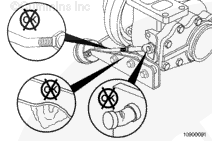
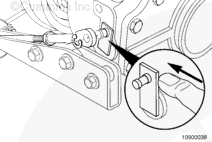
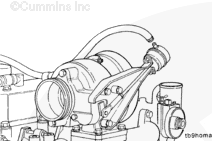
Inspect the wastegate mounting bracket, actuator rod, and lever for damage. A bent wastegate mounting bracket, actuator rod, or lever can cause improper operation.
If the wastegate mounting bracket, actuator rod, or lever is bent, it must be replaced.
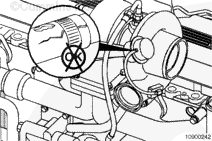
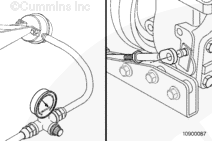
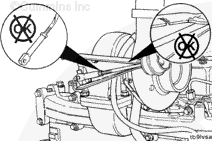
Prior to removal, note position length of the control rod from the boost capsule housing and orientation of the boost capsule hose connector in relation to the mounting bracket.
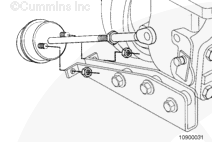
Be careful not to bend the control lever. Engine damage can result.
Remove the boost capsule actuator rod end from the turbocharger wastegate lever. This can be accomplished by slowly applying regulated air pressure to the boost capsule until the control rod is activated.
Remove the control rod from the turbocharger wastegate lever pin.
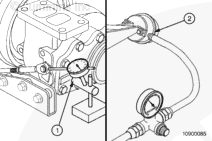
If the boost capsule diaphragm material is ruptured and will not hold air pressure, manually pull the control rod outward in order to overcome boost capsule spring tension for removal of the control rod from the turbocharger wastegate lever pin.
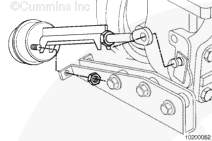
Loosen the boost capsule mounting capscrews, disconnect the air supply hose, and remove the assembly from the mounting bracket.
Inspect the wastegate mounting bracket, actuator rod, and lever for damage. A bent wastegate mounting bracket, actuator rod, or lever can cause improper operation.
If the wastegate mounting bracket, actuator rod, or lever is bent, it must be replaced.
Hello, I'm Jack, a diesel engine fan and a blogger. I write about how to fix and improve diesel engines, from cars to trucks to generators. I also review the newest models and innovations in the diesel market. If you are interested in learning more about diesel engines, check out my blog and leave your feedback.
View all posts by Jack
 CAUTION


;)
;)
;)
;)
;)
;)
;)
;)
;)
;)
;)
;)
;)
;)
;)
;)
;)
;)
;)
;)
;)
;)
;)
;)
;)
;)
;)
;)