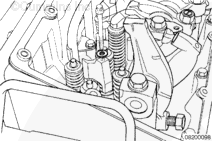
NOTE: Excessive crosshead wear can result if the crossheads are not installed in their original locations. The larger hole on the underside of the crosshead must be oriented toward the exhaust side of the engine.
Remove the crossheads. Make sure to mark them appropriately, so they can be installed in the same location and orientation during the installation procedure.
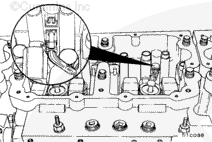
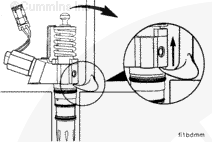
Use injector puller/installer, Part Number 3823579, to remove the CELECT™ injectors. Insert the pin of the tool into the hole provided in the body of the injector. The hole faces the exhaust side of the engine.
NOTE: Mark the position of the push rods as they are removed. Due to wear patterns on the cam follower sockets and adjusting screws, the push rods must be installed in the same positions from which they are removed.
Loosen the locknut and turn out the adjusting screw on each injector and valve rocker lever.
Some push rods are under compression due to the valves being open. Rotate the crankshaft clockwise with the accessory drive pulley to relieve the spring tension.
Hold the push rod with one hand to prevent it from falling into the engine. Loosen each adjusting screw and remove the push rod.
NOTE: Do not remove the links from step timing control injectors.
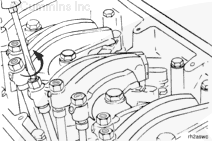
Rotate the injector and valve rocker levers up on each cylinder.
Remove the crossheads. Mark the position and orientation of the crossheads as they are removed. Due to wear patterns, they must be installed in the same positions from which they are removed.
Hello, I'm Jack, a diesel engine fan and a blogger. I write about how to fix and improve diesel engines, from cars to trucks to generators. I also review the newest models and innovations in the diesel market. If you are interested in learning more about diesel engines, check out my blog and leave your feedback.
View all posts by Jack


;)
;)
;)
;)
;)
;)
;)
;)
;)
;)
;)
;)
;)
;)
;)
;)