1. Disconnect both the battery negative cables from the batteries. Refer to Battery Cable in Engine Electrical.
2. Drain the cooling system. Refer to Draining and Filling Cooling System in Engine Cooling.
3. Remove the upper fan shroud from the radiator.
Refer to Fan Shroud Replacement (Upper) in E n g in e Cooling.
4. Remove the drive belt from the drive pulleys.
Refer to Drive Belt Replacement (6.5L Drive Belt).
5. Remove the upper intake manifold from the lower intake manifold (L 56 shown ). Refer to Intake Manifold Replacement (Upper).
6. Remove the lower intake manifold from the cylinder heads. Refer to Intake Manifold Replacement (Lower).
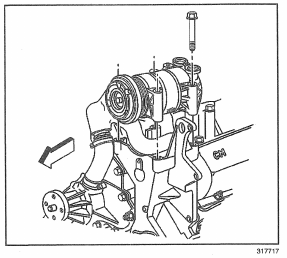
Important: When performing the following service procedure, it is not necessary to completely remove the A/C compressor from the vehicle.
7. Remove the air conditioning compressor from the left accessory bracket and position to the side and secure.
8. Remove the left accessory bracket from the cylinder head (if servicing the left cylinder head). Refer to Accessory Brackets Replacement (Left Side).
9. Disconnect the vacuum line from the vacuum pump.
10. Remove the right accessory bracket from the cylinder head (if servicing the right cylinder head). Refer to Accessory Brackets Replacement (Right Side).
11. Remove the thermostat crossover from the cylinder heads. Refer to Thermostat Housing Crossover Replacement in Engine Cooling.
12. Remove the engine cooling fan from the water pump. Refer to Fan Clutch Replacement (5.0L, 5.7L and 6.5L) in Engine Cooling.
13. Remove the fuel filter/water separator from the cylinder head and locate to the side.
14. Raise the vehicle and support with safety stands.
15. Remove the lower radiator shroud from the radiator. Refer to Fan Shroud Replacement (Lower) in Engine Cooling.
16. Remove the exhaust cross over pipe from the exhaust manifolds. Refer to Exhaust Crossover Pipe Replacement (Diesel) in Engine Exhaust.
17. Lower the vehicle.
18. Remove the turbo charger assembly from the exhaust manifold. Refer to Turbocharger Replacement.
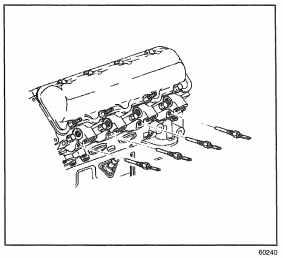
19. Remove the glow plugs and the shields from the cylinder head (left side shown).
20. Remove the left exhaust manifold from the cylinder head (if servicing the left cylinder head ). Refer to Exhaust Manifold Replacement (Left Side).
21. Remove the right exhaust manifold from the cylinder heads (if servicing the right cylinder head). Refer to Exhaust Manifold Replacement (Right Side).
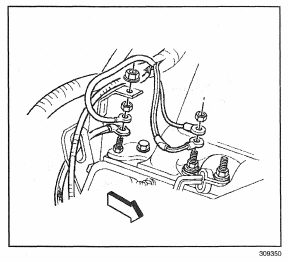
22. Remove the ground strap from the right rear cylinder head.
23. Remove the valve rocker arm covers from the cylinder heads. Refer to Valve Rocker Arm Cover Replacement.
24. Remove the front lower cylinder head bolt (5) an d drain the coolant from the engine block.
24.1. Insert a copper tube 3/8 in x 12 to 18 in long into the cylinder head bolt hole with a hose attached.
24.2. Siphon the coolant from the cylinder head.
25. Remove the valve rocker arm, shaft, and the push rods from the cylinder head. Refer to Valve Rocker Arm, Shaft, and Push Rod Replacement.
26. Remove the transmission oil level indicator from the right rear cylinder head.
Important: Use a rubber band to secure the left rear cylinder head bolt into position before removing the cylinder head.
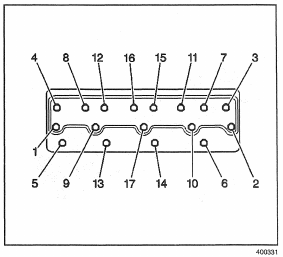
27. Remove the cylinder head bolts in sequence from the engine block.
28. Remove the cylinder head from the engine block.
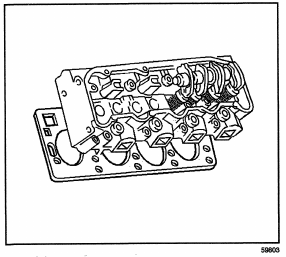
2 9. Remove the cylinder head gasket from the engine block.
30. Disassemble the cylinder head assembly. Refer to Cylinder Head Disassemble.
31. Inspect the sealing surfaces of the engine block.
32. Clean the thread son the cylinder head bolts.
