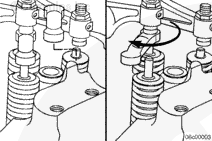
Do not use a heel bar to pry the injector loose from the cylinder head. Damage to the injector can occur.
Use injector puller, Part Number 3823579, to remove the injectors.
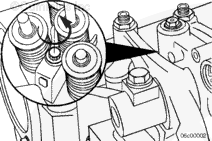
If the injector spring does come loose from the spring retainer, it can be reassembled by using a screwdriver to compress the spring back under the retainer.
Hello, I'm Jack, a diesel engine fan and a blogger. I write about how to fix and improve diesel engines, from cars to trucks to generators. I also review the newest models and innovations in the diesel market. If you are interested in learning more about diesel engines, check out my blog and leave your feedback.
View all posts by Jack
 CAUTION


;)
;)
;)
;)
;)
;)
;)
;)
;)
;)
;)
;)