Do not remove the pressure cap from a hot engine. Wait until the coolant temperature is below 50°C [120°F] before removing the pressure cap. Heated coolant spray or steam can cause personal injury.
WARNING
Coolant is toxic. Keep away from children and pets. If not used, dispose of in accordance with local environmental regulations.
When using solvents, acids or alkaline materials for cleaning, follow the manufacturer’s recommendations for use. Wear goggles and protective clothing to reduce the possibility of personal injury.
WARNING
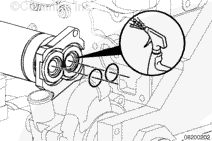
Wear appropriate eye and face protection when using compressed air. Flying debris and dirt can cause personal injury.
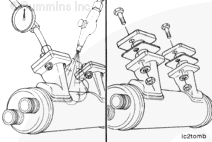
Do not allow dirt to enter the oil passages when cleaning the oil cooler.
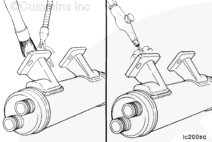
Use solvent to clean the oil cooler. Dry with compressed air.
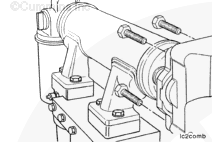
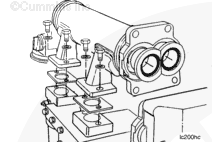
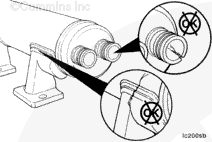
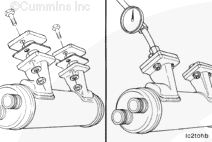
Install the two test plates and gaskets from lubricating oil cooler pressure test kit, Part Number 3376861, to the oil passage openings of the oil cooler housing.
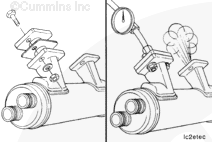
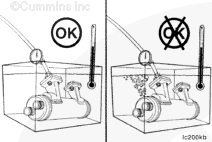
Install a regulated air pressure line to test plate, Part Number 3376889, and apply air pressure.
Do not use petroleum products on the coolant plumbing o-rings. The o-rings will swell and cause the connection to leak.
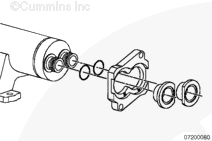
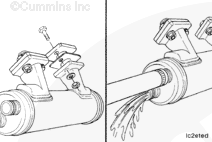
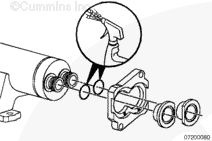
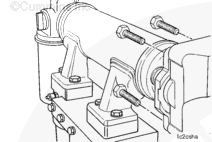
Install two new o-rings on the oil cooler water inlet and outlet transfer tubes.
Lubricate the o-rings with clean engine coolant, soapy water, or vegetable oil to avoid pinching the o-rings while assembling.
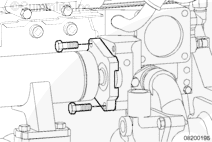
While holding the mounting flange in place, install both transfer tubes into the oil cooler as far as possible. The straight sides of the transfer tube flanges must face each other when installed.
If equipped with four oil cooler thermostat mounting flange capscrews, install the four oil cooler thermostat mounting flange capscrews. Tighten the capscrews alternately and evenly.
Hello, I'm Jack, a diesel engine fan and a blogger. I write about how to fix and improve diesel engines, from cars to trucks to generators. I also review the newest models and innovations in the diesel market. If you are interested in learning more about diesel engines, check out my blog and leave your feedback.
View all posts by Jack
 WARNING


 CAUTION

;)
;)
;)
;)
;)
;)
;)
;)
;)
;)
;)
;)
;)
;)
;)
;)
;)
;)
;)
;)
;)
;)
;)
;)
;)
;)
;)
;)
;)
;)