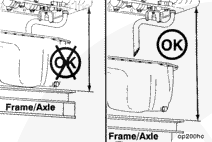
Front sump oil pans have a block-mounted suction tube, which requires approximately 610-mm [24-in] clearance between the vehicle frame or axle and the cylinder block oil pan mounting flange to remove the oil pan.
If an application will not allow the oil pan to be lowered that much, the suction tube must be removed from the cylinder block before the oil pan can be removed from the chassis.
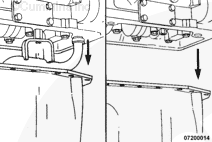
Remove the oil pan mounting capscrews. Lower the oil pan far enough to allow one hand to reach inside the engine and remove the suction tube mounting capscrew.
On front sump oil pans, if the application does not allow approximately 610 mm [24 in] clearance between vehicle frame or axle and the cylinder block oil pan mounting surface during installation, the suction tube and oil pan will need to be installed together as an assembly. Installation requires approximately this much clearance to maneuver the oil pan over the frame or axle and under the block-mounted suction tube when installing the pieces separately. Follow all the steps as outlined on the following pages.
If the application does allow approximately 610-mm [24-in] clearance, install the suction tube first by itself, then the oil pan.
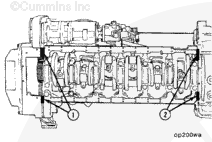
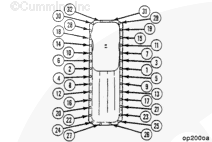
Apply a 2-mm [1/16-in] bead of sealant, Part Number 3823494, to the oil pan mounting surfaces at the cylinder block to gear housing joint (1)
and flywheel housing to cylinder block joint (2).
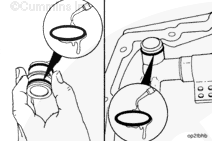
Install a new o-ring to the oil suction tube. Use clean 15W-40 engine oil to lubricate the o-ring.
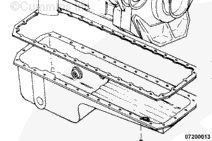
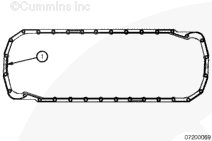
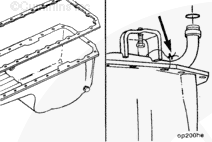
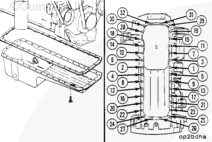
Place a new gasket on the oil pan mounting flange.
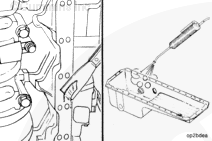
Attach the suction tube to the oil pan mounting flange with a piece of wire. This will hold the suction tube and oil pan together as one assembly until the tube is fastened to the cylinder block.
Maneuver the assembly into place under the engine in the chassis.
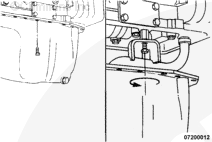
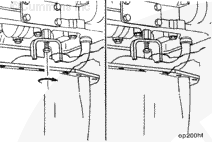
Align the suction tube with the cylinder block suction tube hole. Reach inside the engine, and start the capscrew into the mounting hole to hold the suction tube in place.
After the capscrew is started in the mounting hole by several threads, the wire holding the suction tube to the oil pan can be removed and the oil pan can be lowered to allow more hand clearance to complete the suction tube installation.
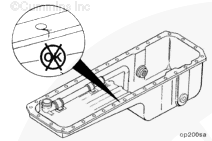
Do not use the capscrew to pull the suction tube into place during installation. Doing so will cause misalignment of the suction tube, which can cause damage to the engine.
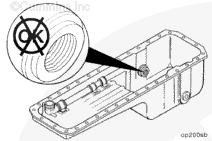
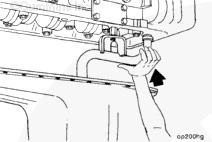
Reach inside the engine, and push the suction tube completely up into place in the cylinder block suction tube mounting hole by hand.
Complete the suction tube retaining capscrew installation.
Apply a 2-mm [1/16-in] bead of sealant, Part Number 3823494, to the oil pan mounting surfaces at the cylinder block to gear housing joint (1)
and flywheel housing to cylinder block joint (2).
Hello, I'm Jack, a diesel engine fan and a blogger. I write about how to fix and improve diesel engines, from cars to trucks to generators. I also review the newest models and innovations in the diesel market. If you are interested in learning more about diesel engines, check out my blog and leave your feedback.
View all posts by Jack


 WARNING


 CAUTION
;)
;)
;)
;)
;)
;)
;)
;)
;)
;)
;)
;)
;)
;)
;)
;)
;)
;)
;)
;)
;)
;)
;)
;)
;)
;)
;)
;)
;)
;)