Cummins Inc. recommends the use of a high-quality SAE 15W-40 Gas engine oil.
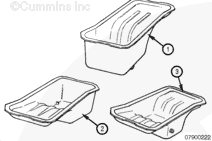
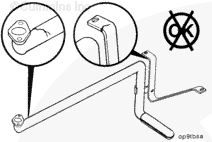
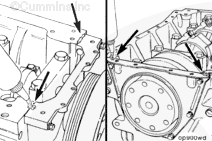
A front sump (1), rear sump (2), or center sump (3) lubricating oil pan option can be used, depending on the application. The mounting of the lubricating oil pickup tube will vary with the lubricating oil pan used.
Some state and federal agencies have determined that used engine oil can be carcinogenic and cause reproductive toxicity. Avoid inhalation of vapor, ingestion, and prolonged contact with used engine oil. If not reused, dispose of in accordance with local environmental regulations.
WARNING
To reduce the possibility of personal injury, avoid direct contact of hot oil with your skin.
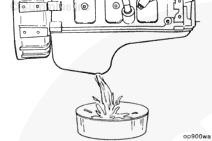
NOTE: Use a container that can hold at least 20 liters [21 qt] of lubricating oil.
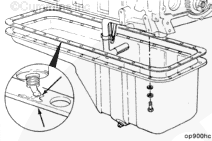
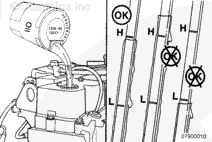
Drain the lubricating oil.
Operate the engine until the coolant temperature reaches 60°C [140°F]. Shut the engine OFF. Remove the oil drain plug. Drain the oil immediately to make sure all the oil and suspended contaminants are removed from the engine.
When using solvents, acids, or alkaline materials for cleaning, follow the manufacturer’s recommendations for use. Wear goggles and protective clothing to reduce the possibility of personal injury.
WARNING
Wear appropriate eye and face protection when using compressed air. Flying debris and dirt can cause personal injury.
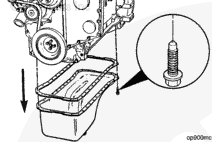
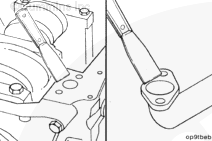
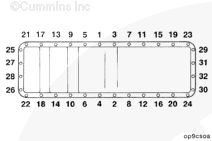
Clean the gasket surfaces.
Remove all gasket material from the cylinder block and oil pan surface.
Steam clean the oil pan, and dry with compressed air.
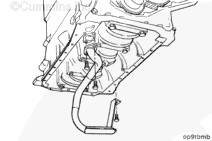
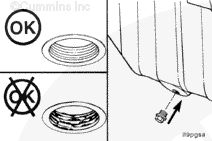
Idle the engine to inspect for leaks at the drain plug.
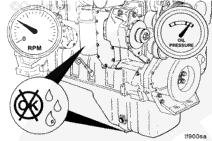
NOTE: Engine oil pressure must be indicated on the gauge within 15 seconds after starting. If oil pressure is not registered within 15 seconds, shut off the engine immediately to avoid engine damage. Confirm the correct oil level in the oil pan.
Hello, I'm Jack, a diesel engine fan and a blogger. I write about how to fix and improve diesel engines, from cars to trucks to generators. I also review the newest models and innovations in the diesel market. If you are interested in learning more about diesel engines, check out my blog and leave your feedback.
View all posts by Jack
 WARNING


;)
;)
;)
;)
;)
;)
;)
;)
;)
;)
;)
;)
;)
;)
;)
;)
;)
;)
;)
;)
;)
;)
;)
;)