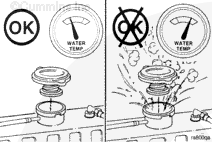
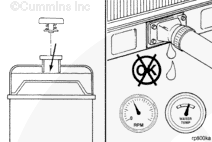
Wait until the temperature is below 50°C [120°F] before removing the coolant system pressure cap. Failure to do so can cause personal injury from heated coolant spray.
Allow the engine to cool and remove the radiator cap.
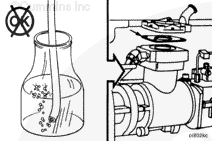
A continuous flow of air bubbles can be caused by one of the following:
Fan, shutter, or heater air control thermostat valve leaking air. Refer to the Leak Test for Fan, Shutter, or Heater Air Control Valve, Procedure 008-019-014.
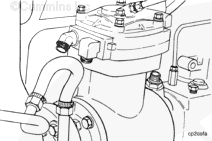
An air compressor cylinder head leak. Refer to the Leak Test for Air Compressor, Procedure 008-019-014.
If one of the air control valves or the air compressor was not the source of air entering the cooling system, perform the Combustion Gas Leak test outlined in Procedure 008-019-014.
The engine can overheat with the fan control or the shutter air control valve disconnected. Monitor the engine coolant temperature while performing this test. The coolant temperature must not exceed 100°C [212°F].
Repeat the test for air in the cooling system as previously described in Procedure 008-019-001. If no air is found in the cooling system with the air control valve(s) isolated, install a new control valve.
NOTE: Start the engine and run for five minutes before testing for air in the coolant. This will allow any trapped air to purge from the system.
The air compressor discharge line must be disconnected at the compressor to allow the compressor to discharge air to the atmosphere to prevent the compressor from overheating during this next test. Do not run the engine over 5 minutes with components isolated from the cooling system. Component damage can occur.
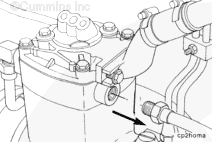
Disconnect the coolant supply and the return tubes from the air compressor. Use a short piece of hose to connect the tubes together to prevent coolant loss during engine operation.
Repeat the test for air in the cooling system as previously described in Procedure 008-019-001. If no air is found in the cooling system with the air compressor isolated, repair or replace the air compressor. Refer to Section 12.
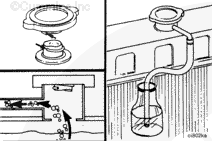
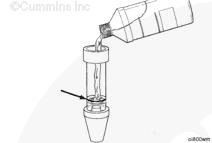
Use combustion gas leak test kit, Part No. 3822985 or equivalent, to test for combustion gases in the cooling system.
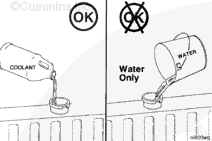
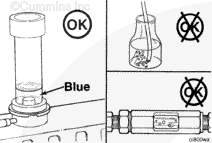
It is recommended that the cooling system contain a mixture of 50 percent antifreeze and 50 percent water during the combustion gas leak test. The use of water only can result in a color change in the test fluid from blue to turquoise or light green during the test. This is not an indication of a combustion gas leak.
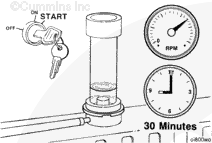
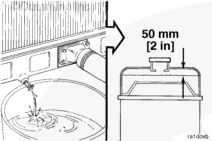
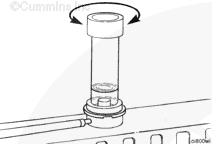
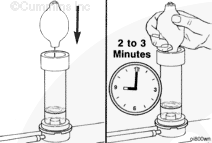
Insert the rubber tip of the combustion gas leak test instrument in the radiator fill neck. Hold the instrument down firmly while turning back and forth to make sure that an air tight seal is formed between the tester and radiator fill neck.
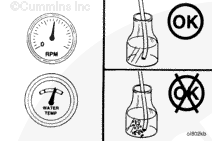
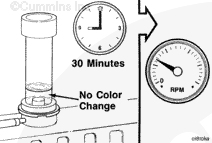
Start the engine and run at high idle for approximately 30 minutes. Monitor the engine temperature and color of the test fluid during engine operation. Do not allow the engine temperature to exceed 100°C [212°F] during the test.
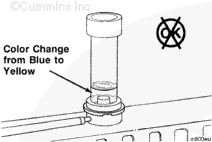
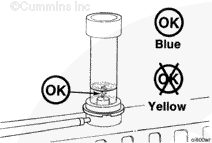
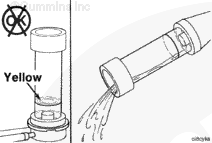
If the color of the test fluid changes from blue to yellow anytime during the test, combustion gases are leaking into the cooling system. Discontinue the test if the color of test fluid changes from blue to yellow.
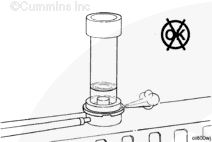
Insert the tip of the rubber ball into the hole in the top of the test instrument. Squeeze the rubber ball 2 to 3 minutes to draw air from the radiator through the test fluid.
If the color of the test fluid remains blue, combustion gases are not entering the cooling system. If the color of the test fluid changes from blue to yellow, combustion gases are entering the cooling system. Further investigation is required to determine the source of the combustion leak.
As the cooling system warms up to operating temperature, air will be expelled through the combustion gas tester in the form of bubbles in the test fluid. This is due to normal expansion of the coolant. Do not mistake the presence of air bubbles in the tester as combustion gases, or air leaks into the cooling system. A change in the color of the test fluid from blue to yellow is the only indication of combustion gas in the cooling system.
A negative result from the combustion gas leak tester coupled with a continuous flow of air bubbles from the previous test indicates the following:
Defective fan, shutter, or heater air control valve Air compressor head or head gasket leakage Air entrained due to a bad radiator check valve or incorrect fill.
Air compressor head or head gasket leakage
Air entrained due to a bad radiator check valve or incorrect fill.
Hello, I'm Jack, a diesel engine fan and a blogger. I write about how to fix and improve diesel engines, from cars to trucks to generators. I also review the newest models and innovations in the diesel market. If you are interested in learning more about diesel engines, check out my blog and leave your feedback.
View all posts by Jack
 WARNING




 CAUTION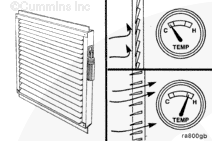
;)
;)
;)
;)
;)
;)
;)
;)
;)
;)
;)
;)
;)
;)
;)
;)
;)
;)
;)
;)
;)
;)
;)
;)
;)
;)
;)
;)
;)
;)
;)
;)
;)
;)
;)
;)
;)
;)
;)
;)