The plumbing and make-up tank included in the Centinel™ kits may not be adequate for use in all applications. All applicable local, state and federal regulations and any institutional codes must be consulted to ensure that all components satisfy these regulations and codes. Any component that does not satisfy any applicable regulation or code must be replaced with a component that does.
NOTE: Refer to Procedure 208-002 for appropriate tank mounting location.
The small and large make-up oil tanks must be supported by at least four bolts. If only four bolts are used, they must be located on all four corners of the make-up oil tank.
To help prevent leaks, apply pipe sealing compound to any pipe fittings.
There is no make-up oil tank to compensate for oil burned via the Centinel™
burn-only system. Oil must be added to the engine on a daily basis to compensate for oil burned via the Centinel™ system and to compensate for normal engine oil consumption.
Vehicles domiciled in California can not use any system
(like Centinel™) that blends used engine oil with diesel fuel. (Check CARB regulations.)
NOTE: Marine applications require that all hoses and fittings comply to SAE standards J1942 and J1527. Not all hoses and fittings supplied in the Centinel™ kits comply with these SAE standards. A metal make-up tank can also be required for Marine applications.
The plumbing and make-up tank included in the Centinel™ kits may not be adequate for use in all applications. All applicable local, state and federal regulations and any institutional codes must be consulted to ensure that all components satisfy these regulations and codes. Any component that does not satisfy any applicable regulation or code must be replaced with a component that does.
NOTE: The area selected must be convenient for the operator to fill the make-up oil tank and see the fault code warning lamps.
Mount the make-up oil tank assembly.
NOTE: The following torque requirements are for plastic tank fasteners.
Maximum torque when using self-locking nuts is 34 N•m [25 ft-lb].
Maximum torque when not using self-locking nuts is 20 N•m [177 in-lb].
Always use a 3/4-inch outer diameter round washer
(maximum) with the old style tank design. Currently, this only
applies to the 24.6 liters [6.5-gallon] tank.
Always use a 7/8-inch square washer with the new style tank design. Currently, this only applies to the 15-liter
[4-gallon] tanks.
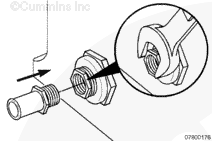
When installing the fitting or elbow into the make-up tank, hold the make-up tank fitting with a wrench while tightening the fitting or elbow. Failure to hold the make-up tank fitting during installation of the fitting or elbow can cause damage to the bottom of the tank.
Install the 3/4-inch pipe thread fitting to the bottom of the make-up tank.
Hoses must not be routed near excessively hot components and must be securely fastened to be sure they do not contact hot or moving components during any operating conditions. If routing near hot components can not be avoided, then a fire sleeve around the hose must be used. All hoses must be adequately protected from chafing and fastened to appropriate structure, such that there is no overhung load on connections.
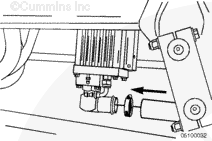
Route the 3/4-inch clean oil supply hose from the make-up tank to the Centinel valve. The hose must not be routed near any moving parts or hot surfaces.
Some state and federal agencies have determined that used engine oil can be carcinogenic and cause reproductive toxicity. Avoid inhalation of vapors, ingestion, and prolonged contact with used engine oil. If not reused, dispose of in accordance with local environmental regulations.
CAUTION
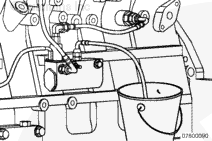
If the system is not properly primed, improper system operation can occur, resulting in make-up oil not being added to the engine.
Wear appropriate eye and face protection when using compressed air. Flying debris and dirt can cause personal injury.
CAUTION
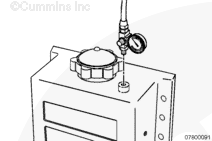
When applying air pressure to the make-up tank, do not exceed 124 kPa [18 psi] air pressure. Exceeding 124 kPa [18 psi] air pressure will cause damage to the make-up tank.
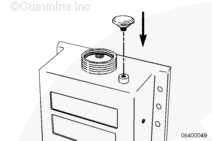
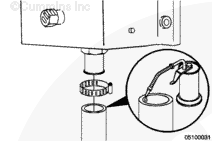
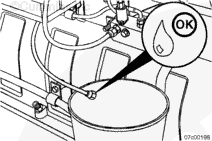
Temporarily plug any tank vents as necessary and apply 69 to 103 kPa
[10 to 15 psi] air pressure to the oil make-up tank to force the oil through the hose and valve. Due to installation variances, this pressure will probably need to be increased in 14 to 21 kPa [2 to 3 psi] increments.
NOTE: This purging pressure requirement must be accounted for in any non-Cummins-supplied oil make-up tank design.
Hello, I'm Jack, a diesel engine fan and a blogger. I write about how to fix and improve diesel engines, from cars to trucks to generators. I also review the newest models and innovations in the diesel market. If you are interested in learning more about diesel engines, check out my blog and leave your feedback.
View all posts by Jack
 CAUTION


 WARNING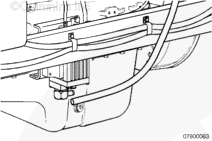





;)
;)
;)
;)
;)
;)
;)
;)
;)
;)
;)
;)
;)
;)
;)
;)
;)
;)
;)
;)