Belt tensioner is spring loaded. Do not attempt to disassemble the tensioner. Personal injury can result.
WARNING
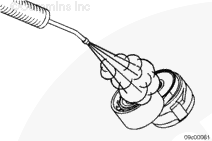
When using solvents, acids, or alkaline materials for cleaning, follow the manufacturer’s recommendations for use. Wear goggles and protective clothing to reduce the possibility of personal injury.
Check the tensioner for dirt buildup. If tensioner has dirt buildup, remove and use safety solvent to clean belt tensioner.
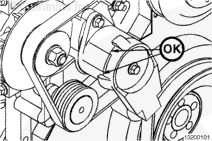
With the engine off, belt still installed, check that neither the top or bottom tensioner air stop is touching the cast boss on the tensioner body. If either of the stops is touching a boss, remove the belt.
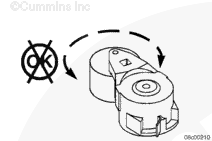
Pivot the tensioner through the full range of motion. Tensioner must move with resistance, if not replace tensioner.
If this check is okay, check the belt part number. Make sure that the belt is correct for this option number.
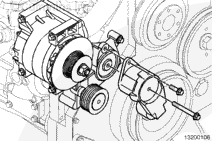
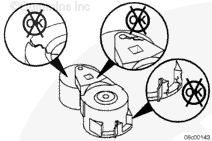
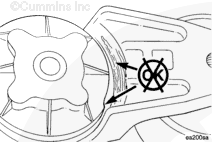
Inspect the belt tensioner for evidence of the pivoting tensioner are contacting the stationary circular base of the tensioner or the alternator bracket. If so, the pivot bushing is excessive worn. Replace the belt tensioner.
Hello, I'm Jack, a diesel engine fan and a blogger. I write about how to fix and improve diesel engines, from cars to trucks to generators. I also review the newest models and innovations in the diesel market. If you are interested in learning more about diesel engines, check out my blog and leave your feedback.
View all posts by Jack


 WARNING


;)
;)
;)
;)
;)
;)
;)
;)
;)
;)
;)
;)
;)
;)