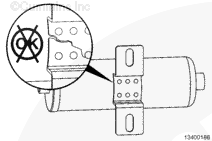
To reduce the possibility of personal injury, do not touch any ignition wires or components while the engine is operating, unless using suitably insulated tools.
To reduce the possibility of personal injury, do not touch any ignition wires or components while the engine is operating, unless using suitably insulated tools.
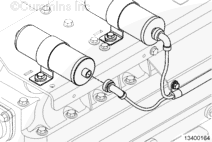
Disconnect the wiring harness from the ignition coil.
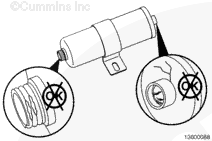
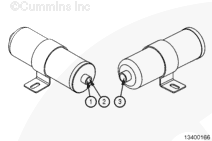
Measure the resistance between the negative primary pin (1) of each coil connector and the engine block. The resistance must be greater than 10M ohms.
Measure the resistance between the positive primary pin (2) and negative primary pin (1). The resistance must be less than 1 ohm.
Measure the resistance between the negative primary pin (1) and the high voltage secondary electrode (3). The resistance must be in the range of 3000 to 8000 ohms.
If any of the resistance measurements are not within the specified range, the coil must be replaced.
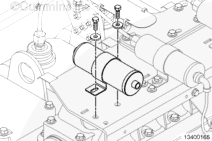
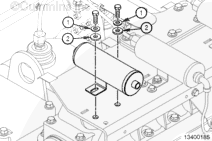
Install the ignition coil onto the mounting bracket.
Install and tighten the capscrews.
There are two designs of mounting hardware; the hex head capscrew and the captive washer capscrew.
For the hex head capscrew configuration, there are two flat washers with different diameters. Be certain the larger diameter washer (2) is placed below the smaller diameter washer (1) as shown in the illustration.
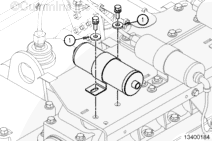
The captive washer capscrew configuration has a captive lock washer and a large diameter flat washer (1). Install the flat washer as shown the illustration.
Hello, I'm Jack, a diesel engine fan and a blogger. I write about how to fix and improve diesel engines, from cars to trucks to generators. I also review the newest models and innovations in the diesel market. If you are interested in learning more about diesel engines, check out my blog and leave your feedback.
View all posts by Jack
 WARNING


;)
;)
;)
;)
;)
;)
;)
;)
;)
;)
;)
;)
;)
;)
;)
;)