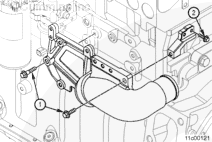
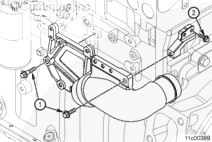
Inspect the ends and mating joints of the bracket for signs of fretting or material transfer, cracks, or other damage. Replace the EGR valve support bracket if fretting or material transfer, cracks, or other damage is found.
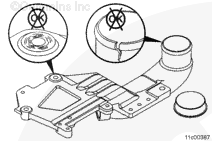
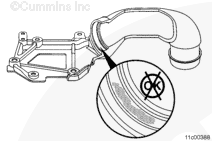
Corrosion is normal and will be found at the EGR valve to bracket joint. Clean the corrosion off the sealing surface using safety solvent, or a Scotch Brite™ 7448 abrasive pad.
The new seal will not function properly if the bracket sealing surface have been cleaned with a power tool combined with abrasive pads.
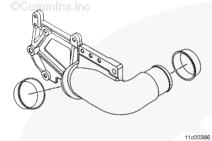
Inspect the sealing surface for signs of excessive pitting at the EGR connection jumper seals. If the pitting is large enough to catch a fingernail, replace the EGR valve support bracket.
Hello, I'm Jack, a diesel engine fan and a blogger. I write about how to fix and improve diesel engines, from cars to trucks to generators. I also review the newest models and innovations in the diesel market. If you are interested in learning more about diesel engines, check out my blog and leave your feedback.
View all posts by Jack


;)
;)
;)
;)
;)
;)
;)
;)
;)
;)
;)
;)