When using solvents, acids, or alkaline materials for cleaning, follow the manufacturer’s recommendations for use. Wear goggles and protective clothing to reduce the possibility of personal injury.
WARNING
Some solvents are flammable and toxic. Read the manufacturer’s instructions before using.
Use mineral spirits. Clean all of the parts except the coil assembly.
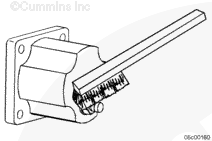
NOTE: Do not get solvent on the coil. Clean the coil with a dry cloth. Use a 200-grit emery cloth and a flat surface to polish the coil surface.
Check the valve disc, valve seat, and actuator disc for dirt, metal parts, bonding separation, corrosion, cracks, or wear. Replace if necessary.
Align the actuator disc, spacer, and valve disc on the electronic control valve body.
Install a new o-ring.
Put the spring washer on the valve disc with the cavity side positioned upward.
NOTE: The coil must be oriented with the electrical connection post on the bottom.
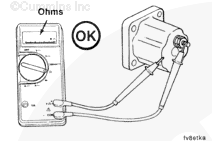
NOTE: Make sure the shutoff valve coil is the correct voltage (12 VDC). The coil voltage and part number are cast into the terminal connection end of the coil.
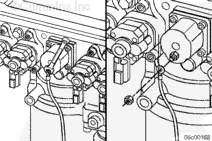
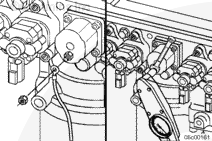
Install the fuel shield and coil onto the front cover.
Install a new o-ring and tighten the Allen head capscrews.
Hello, I'm Jack, a diesel engine fan and a blogger. I write about how to fix and improve diesel engines, from cars to trucks to generators. I also review the newest models and innovations in the diesel market. If you are interested in learning more about diesel engines, check out my blog and leave your feedback.
View all posts by Jack



 WARNING





;)
;)
;)
;)
;)
;)
;)
;)
;)
;)
;)
;)
;)
;)