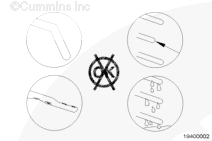
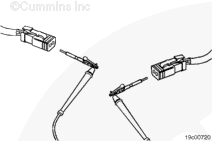
Do not use probes or leads other than Part Number 3822758 and Part Number 3822917. The connector will be damaged. The leads must fit tightly in the connector without expanding the pins in the connector.
Check for an open circuit in the fuel lift pump return circuit.
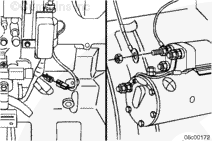
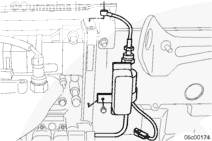
Disconnect the 2-pin fuel lift pump power connector at the fuel lift pump.
Disconnect the fuel lift pump relay power connector where the OEM harness connects to the engine harness.
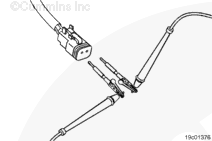
Measure the resistance of the fuel lift pump return between these two connectors.
The resistance must be 10 ohms or less.
If the resistance is greater than 10 ohms, repair or replace the engine harness.
Do not use probes or leads other than Part Number 3164572. The connector will be damaged. The leads must fit tightly in the connector without expanding the pins in the connector.
Check for an open circuit in the fuel lift pump relay return line.
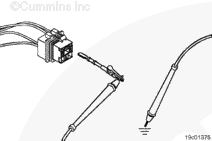
Measure the resistance from the fuel lift pump relay return pin in the engine harness relay connector to engine block ground.
The resistance must be 10 ohms or less.
If the resistance is greater than 10 ohms, repair or replace the engine harness ground.
Do not use probes or leads other than Part Number 3822758 and Part Number 3822917. The connector will be damaged. The leads must fit tightly in the connector without expanding the pins in the connector.
Remove the fuel lift pump power connector at the fuel lift pump.
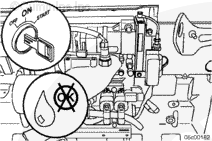
Turn the keyswitch to the ON position.
Measure the voltage between the fuel lift pump supply pin and the fuel lift pump return pin on the harness connector.
The voltage must be battery voltage.
If voltage is not present, check the fuse on the fuel lift pump relay supply line. Replace if necessary.
If the voltage is not correct, disconnect the 2-pin connector between the OEM harness and the engine harness that supplies the fuel lift pump relay with unswitched battery power.
Measure the voltage at the 2-pin connector on the OEM harness.
The voltage must be battery voltage.
If voltage is not present, repair or replace the OEM wiring or contact a Cummins® Authorized Dealer.
Unplug the fuel lift pump relay from the engine harness connector.
Connect the 2-pin fuel lift pump power connector to the fuel lift pump.
Insert a jumper wire between the fuel lift pump relay supply pin and the fuel lift pump supply pin in the engine harness relay connector.
If the fuel lift pump is functioning correctly, the fuel lift pump will operate.
If the lift pump does not operate when using the jumper wire, Refer to Procedure 019-396 in the CM870 Electronic Control System, Signature™ and ISX Engines Troubleshooting and Repair Manual, Bulletin 4021334, for replacing the lift pump.
Turn the ignition switch to the ON position to activate integrated fuel system mounted, automotive, or industrial timing module priming pumps. Repeat if necessary.
Measure the fuel pressure at the gear pump inlet Compuchek™ fitting.
If 69 kPa [10 psi] or greater is indicated, the lift pump is operating correctly.
If less than 69 kPa [10 psi] is indicated, check the pressure while drawing fuel from a bucket.
Batteries can emit explosive gases. To reduce the possibility of personal injury, always ventilate the compartment before servicing the batteries. To reduce the possibility of arcing, remove the negative (-) battery cable first and attach the negative (-) battery cable last.
CAUTION
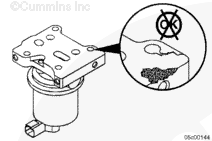
If the unit has recently switched to Bio-diesel or Ultra Low Sulfur diesel and has a fuel leak, the entire lift pump must be replaced, not only the gasket.
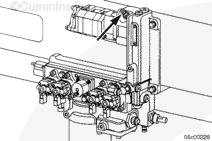
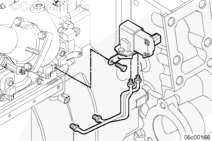
EGR differential pressure sensor. Refer to Procedure 019-043 in the CM870 Electronic Control System, Signature™ and ISX Engines Troubleshooting and Repair Manual, Bulletin 4021334.
When using solvents, acids, or alkaline materials for cleaning, follow the manufacturer’s recommendations for use. Wear goggles and protective clothing to reduce the possibility of personal injury.
WARNING
Some solvents are flammable and toxic. Read the manufacturer’s instructions before using.
WARNING
Wear appropriate eye and face protection when using compressed air. Flying debris and dirt can cause personal injury.
The fuel lift pump is extremely sensitive to debris. A small amount of debris in the lift pump can cause the lift pump to fail, causing it to need replacement. Only service the lift pump in clean areas and use care not to allow debris into the system.
CAUTION
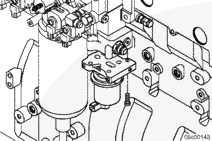
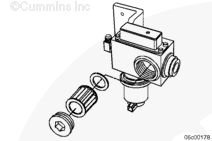
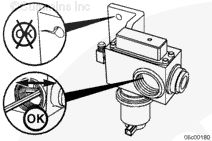
The lift pump contains many loose parts. Use care when removing the lift pump body from the adaptor and keep the lift pump vertical.
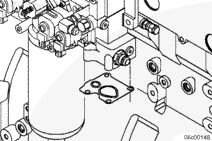
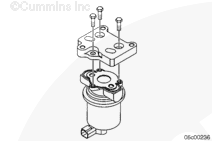
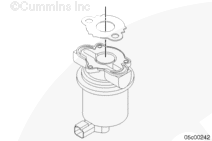
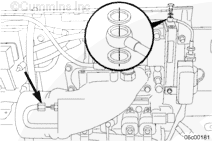
This step includes the method for removing and installing the fuel lift pump gasket.
Install the fuel lift pump and the four capscrews.
Tighten the capscrews.
Torque Value: 18 n.m [159 in-lb]
To verify the lift pump is not leaking, turn the keyswitch to the ON position with the engine off, operate the lift pump for three minutes, and check for leaks.
EGR differential pressure sensor. Refer to Procedure 019-043 in the CM870 Electronic Control System, Signature™ and ISX Engines Troubleshooting and Repair Manual, Bulletin 4021334.
Hello, I'm Jack, a diesel engine fan and a blogger. I write about how to fix and improve diesel engines, from cars to trucks to generators. I also review the newest models and innovations in the diesel market. If you are interested in learning more about diesel engines, check out my blog and leave your feedback.
View all posts by Jack


 CAUTION


 WARNING










;)
;)
;)
;)
;)
;)
;)
;)
;)
;)
;)
;)
;)
;)
;)
;)
;)
;)
;)
;)
;)
;)
;)
;)
;)
;)
;)
;)
;)
;)
;)
;)
;)
;)
;)
;)
;)
;)
;)
;)
;)
;)
;)
;)
;)
;)
;)
;)
;)
;)
;)
;)