Engine intake air must be filtered to prevent dirt and debris from entering the engine. If intake air piping is damaged or loose, unfiltered air will enter the engine and cause premature wear.
Inspect for loose clamps or damage between the intake air piping, air cleaner, turbocharger, charge-air cooler, and intake manifold.
Check for corrosion of the intake system piping under the clamps and hoses. Corrosion can allow corrosive products and dirt to enter the intake system. Disassemble and clean as required.
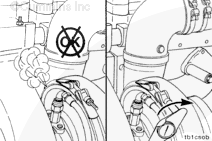
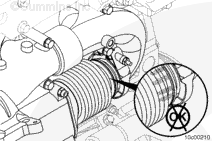
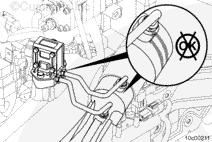
Do not use air tools to remove or install the nut on the v-band clamp. Use of these tools can seriously damage the threads or the bolt and cause the clamp to not be able to be reused.
The noise can be caused by an air leak from the following:
Do not use air tools to remove or install the nut on the v-band clamp. Use of these tools can seriously damage the threads or the bolt and cause the clamp to not be able to be used.
Turbine housing sealing surface air leak.
Tighten the v-band clamp.
Torque Value: 14 n.m [124 in-lb]
Check for an air leak.
If an air leak is still present, remove and replace the turbocharger.
Check for soot streaks from the EGR connection tubes and hoses.
Tighten the hose clamps. Refer to Procedure 011-025. Check for an exhaust leak. If an exhaust leak is still present, remove and replace the EGR crossover tube or hose.
Check for soot leakage at the EGR differential pressure sensing tubes.
Inspect for signs of leakage such as soot streaks which may appear yellowish brown or black. If signs of leakage are present, replace the EGR differential pressure tubes. Refer to Procedure 011-026.
Check for soot leakage on the exhaust adapter pipe.
Inspect for signs of leakage such as soot streaks which may appear yellowish brown or black. If signs of leakage are present, replace the gasket and v-band clamp. Refer to Procedure 011-007 for the bellows and Procedure 011-019 for the exhaust manifold.
Clean all soot stains and paint the components in order to detect future leaks.
Inspect for visible soot streaks at the v-band joint.
If soot streaks are found, check for fault codes relating to high differential pressure in the aftertreatment system. If no fault codes are found, tighten the v-band clamp. Refer to Procedure 011-050.
Operate the engine at full throttle and check for leakage at full throttle condition.
If a leak is still present, remove and replace with a new gasket and v-band clamp.
Check the catalyst to aftertreatment particulate trap connection.
Inspect for visible soot streaks at the v-band joint.
If soot streaks are found, check for fault codes relating to high differential pressure in the aftertreatment system. If no fault codes are found, tighten the v-band clamp. Refer to Procedure 011-049.
Operate the engine at full throttle and check for leakage at full throttle condition.
If a leak is still present, remove and replace the gasket with a new gasket and v-band clamp.
Check the aftertreatment diesel particulate filter to outlet connection.
Inspect for visible soot streaks at the v-band joint.
If soot streaks are found, check for fault codes relating to high differential pressure in the aftertreatment system. If no fault codes are found, tighten the v-band clamp. Refer to Procedure 011-041.
Operate the engine at full throttle and check for leakage at full throttle condition.
If a leak is still present, remove and replace with a new gasket and v-band clamp.
Inspect for visible soot streaks at the v-band joint.
If soot streaks are found, check for fault codes relating to high differential pressure in the aftertreatment system. If no fault codes are found, tighten the v-band clamp. Refer to Procedure 011-041.
Operate the engine at full throttle and check for leakage at full throttle condition.
If a leak is still present, remove and replace with a new gasket and v-band clamp.
Inspect for visible soot streaks at the threaded bosses or hose connections.
If soot streaks are found at the threaded boss, loosen the differential pressure sensor tube nut, apply a coating of anti-seize compound, and tighten the differential pressure sensor tube nut. Refer to Procedure 011-047.
If soot streaks are found at the hose connections, remove and connect hose. Refer to Procedure 011-047.
Operate the engine at full throttle and check for leakage at full throttle condition.
If a leak is still present at the threaded boss, remove and replace the differential pressure sensor tube.
If a leak is still present at the hose connection, replace the differential pressure sensor tube or differential pressure sensor, depending on which component the hose is permanently attached to.
If damage resulted in coolant, oil, excessive fuel or excessive black smoke entering the exhaust system, the aftertreatment system must be inspected. Refer to Procedure 014-013.
Hello, I'm Jack, a diesel engine fan and a blogger. I write about how to fix and improve diesel engines, from cars to trucks to generators. I also review the newest models and innovations in the diesel market. If you are interested in learning more about diesel engines, check out my blog and leave your feedback.
View all posts by Jack
 CAUTION