Some state and federal agencies have determined that used engine oil can be carcinogenic and cause reproductive toxicity. Avoid inhalation of vapors, ingestion, and prolonged contact with used engine oil. If not reused, dispose of in accordance with local environmental regulations.
CAUTION
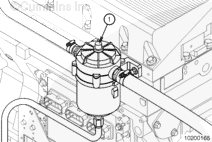
It is recommended that all service be performed with the engine shut down.
Identify a place to set the canister without spilling any oil remaining in it.
Use shop towels to clean up any oil that drips from the canister or filter.
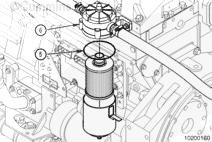
Hold onto the canister and release the four latches (2) which hold the canister to the filter head assembly.
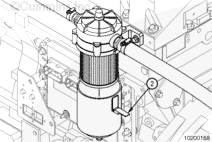
Pull the canister down, being careful not to spill any oil remaining in the bottom of the canister.
Set the canister in the place identified earlier.
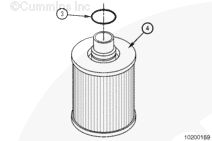
Pull down on the filter to remove it. Make sure the o-ring (3) on the top of the end cap is removed with the filter. Dispose of the filter.
Remove the o-ring from the bottom of the head assembly, if a new o-ring is available.
Hello, I'm Jack, a diesel engine fan and a blogger. I write about how to fix and improve diesel engines, from cars to trucks to generators. I also review the newest models and innovations in the diesel market. If you are interested in learning more about diesel engines, check out my blog and leave your feedback.
View all posts by Jack

 WARNING
  CAUTION

;)
;)
;)
;)
;)
;)
;)
;)