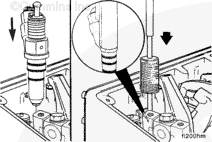
Do not drive the injector in by striking the solenoid valve area. This can damage the solenoid or cause the injector to be out of alignment in the bore, which will result in o-ring damage.
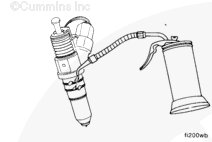
Place the injector in the cylinder head injector bore with the injector solenoid valve toward the intake port. Align the injector equally between the valve springs.
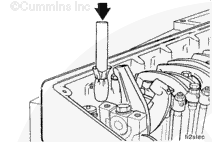
Use injector tool, Part Number 3823579, to seat the injector in the bore.
The injector must be fully seated before installing the hold-down clamp. The hold-down clamp can not pull the injector into the bore. Engine damage can occur if the injector is not fully seated.
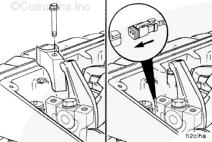
Install the injector hold-down clamp capscrew.
Torque Value: 75 n.m [55 ft-lb]
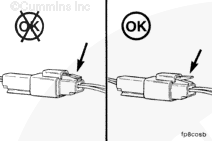
Connect the injector wires. Make sure the wires are connected to the same cylinder they were removed from.
Hello, I'm Jack, a diesel engine fan and a blogger. I write about how to fix and improve diesel engines, from cars to trucks to generators. I also review the newest models and innovations in the diesel market. If you are interested in learning more about diesel engines, check out my blog and leave your feedback.
View all posts by Jack
 CAUTION


;)
;)
;)
;)
;)
;)
;)
;)
;)
;)