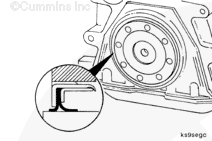
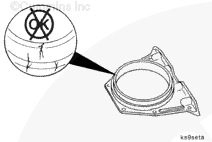
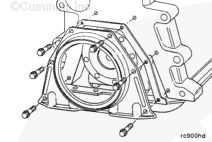
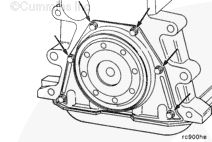
The rear crankshaft seal is mounted in a housing that bolts to the rear of the cylinder block. Double-lipped Teflon™ seals are used. The sealing surface on the crankshaft must be clean and free of lubricating oil during installation of the seal.
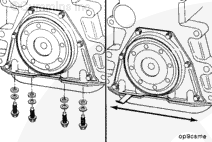
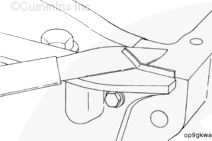
Use extreme care when releasing the oil pan gasket from the rear cover to prevent damage to the gasket.
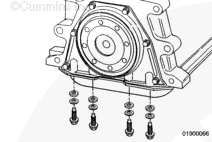
Remove the four lubricating oil pan mounting capscrews that secure the oil pan to the rear cover.
Insert a feeler gauge or shim stock between the rear cover and the oil pan gasket. Move the feeler gauge or the shim stock back and forth to release the gasket from the rear cover.
If the gasket is damaged, the oil pan must be removed and the gasket replaced. Refer to Procedure 007-025.
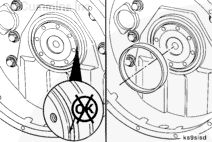
Do not nick or gouge the crankshaft with the chisel. If the crankshaft is damaged, it must be replaced.
Hammer, Chisel
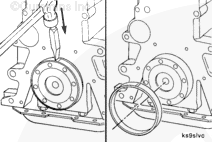
If the crankshaft currently has a wear sleeve, it must
be removed before installing a new one.
Use a dull chisel that is only as wide as the wear sleeve.
Make one or two soft blows with a hammer to make chisel marks across the wear sleeve. This will expand the wear sleeve, allowing the sleeve to be removed.
When using solvents, acids, or alkaline materials for cleaning, follow the manufacturer’s recommendations for use. Wear goggles and protective clothing to avoid personal injury.
WARNING
Compressed air used for cleaning should not exceed 207 kPa [30 psi]. Wear appropriate eye and face protection when using compressed air. Flying debris and dirt can cause bodily injury.
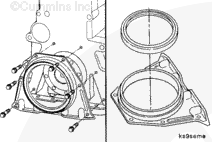
Clean the gasket surface of the cylinder block and rear cover using solvent and a clean brush.
Dry these areas with compressed air.
Use a crocus cloth to remove any rust or other deposits from the crankshaft flange.
NOTE: Do not use any kind of lubricant to install the seal. The oil seal must be installed with the lip of the oil seal and the crankshaft clean and dry to be sure of proper oil sealing. Clean the lip of the oil seal of any existing lubricant.
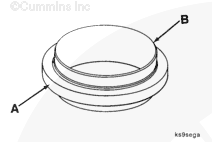
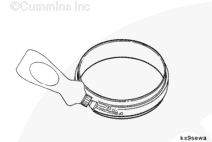
NOTE: The combination crankshaft oil seal (A) wear sleeve (B) replacement kit for service usage is installed on the crankshaft as an assembly. The crankshaft rear oil seal should not be removed from the crankshaft rear seal wear sleeve.
NOTE: If the oil pan is installed, loosen the oil pan capscrews to allow clearance for rear cover and gasket clearance.
NOTE: The seal installation is being used to align the rear cover properly. Do not push or force the cover in any direction to prevent irregular seal lip position after seal installation.
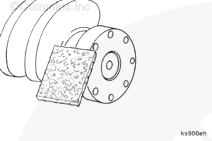
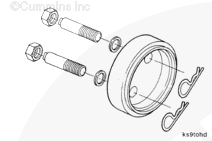
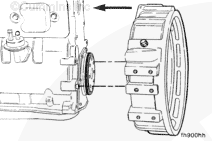
Crankshaft Rear Seal/Wear Sleeve Installation Tool, Part No. 3824078
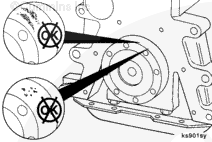
Use a service tool, Part No. 3824078, to install oil seal/wear sleeve assembly. Install two (2) threaded studs into the crankshaft capscrew holes.
Apply a small amount of clean lubricating engine oil to the crankshaft, threaded studs, and inside diameter of the crankshaft rear seal/wear sleeve installation tool.
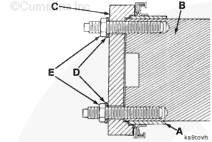
Position the chamfered end of the wear sleeve (A) onto the end of the crankshaft (B). Position the counterbore end of installation tool (C) over threaded studs, and align with wear sleeve, perpendicular to the end of the crankshaft. Install the washers (D) and nuts (E) onto the threaded studs.
Alternately tighten the nuts one-half turn until the installation tool contacts the end of the crankshaft.
Hello, I'm Jack, a diesel engine fan and a blogger. I write about how to fix and improve diesel engines, from cars to trucks to generators. I also review the newest models and innovations in the diesel market. If you are interested in learning more about diesel engines, check out my blog and leave your feedback.
View all posts by Jack


 CAUTION
 WARNING


;)
;)
;)
;)
;)
;)
;)
;)
;)
;)
;)
;)
;)
;)
;)
;)
;)
;)
;)
;)
;)
;)
;)
;)
;)
;)
;)
;)
;)
;)
;)
;)
;)
;)
;)
;)
;)
;)
;)
;)
;)
;)
;)
;)
;)
;)
;)
;)