Batteries can emit explosive gases. To reduce the possibility of personal injury, always ventilate the compartment before servicing the batteries. To reduce the possibility of arcing, remove the negative (-) battery cable first and attach the negative (-) battery cable last.
Batteries can emit explosive gases. To reduce the possibility of personal injury, always ventilate the compartment before servicing the batteries. To reduce the possibility of arcing, remove the negative (-) battery cable first and attach the negative (-) battery cable last.
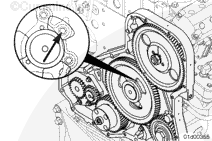
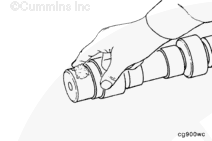
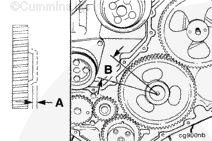
Use cam gear removal and installation tool, Part Number 3163054, and puller assembly, Part Number 3165093, to remove the camshaft gear from the camshaft.
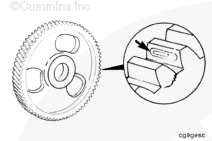
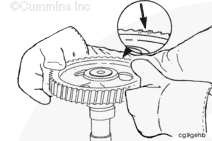
NOTE: If fretting or burrs can not be removed with abrasive pad, Part Number 3823258 or equivalent, replace the camshaft. Refer to Procedure 001-008 in Section 1.
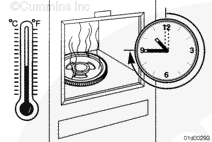
The camshaft gear will be permanently distorted if overheated. The oven temperature should never exceed 204°C [400°F].
Heat the camshaft gear for 45 minutes.
Measurements
celsius
fahrenheit
Oven Temperature
204
400
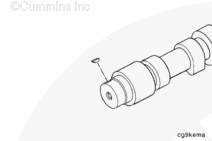
Use camshaft gear removal and installation tool, Part Number 3163054, and puller assembly, Part Number 3165093, to install the camshaft gear onto the camshaft.
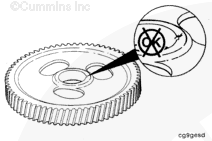
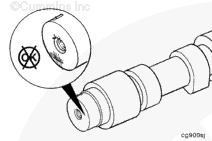
NOTE: Be sure the gear is seated against camshaft shoulder.
Use a 0.02 mm [0.001] feeler gauge, to see if the feeler gauge can be inserted between the camshaft gear and the shoulder on the camshaft. Insert the feeler gauge in multiple locations. If the feeler gauge can be inserted, the camshaft gear is not properly seated.
Batteries can emit explosive gases. To reduce the possibility of personal injury, always ventilate the compartment before servicing the batteries. To reduce the possibility of arcing, remove the negative (-) battery cable first and attach the negative (-) battery cable last.
Batteries can emit explosive gases. To reduce the possibility of personal injury, always ventilate the compartment before servicing the batteries. To reduce the possibility of arcing, remove the negative (-) battery cable first and attach the negative (-) battery cable last.
Hello, I'm Jack, a diesel engine fan and a blogger. I write about how to fix and improve diesel engines, from cars to trucks to generators. I also review the newest models and innovations in the diesel market. If you are interested in learning more about diesel engines, check out my blog and leave your feedback.
View all posts by Jack

 WARNING


 CAUTION

;)
;)
;)
;)
;)
;)
;)
;)
;)
;)
;)
;)
;)
;)
;)
;)
;)
;)
;)
;)
;)
;)
;)
;)