Batteries can emit explosive gases. To reduce the possibility of personal injury, always ventilate the compartment before servicing the batteries. To reduce the possibility of arcing, remove the negative (-) battery cable first and attach the negative (-) battery cable last.
WARNING
Do not remove the pressure cap from a hot engine. Wait until the coolant temperature is below 50°C [120°F] before removing the pressure cap. Heated coolant spray or steam can cause personal injury.
WARNING
Coolant is toxic. Keep away from children and pets. If not reused, dispose of in accordance with local environmental regulations.
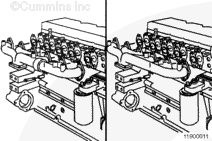
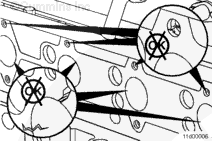
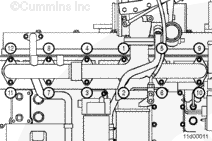
NOTE: Brush away all dirt from around the area of the air handling connections to avoid contamination of the interior of the engine.
Remove the capscrews, exhaust manifold, and gaskets.
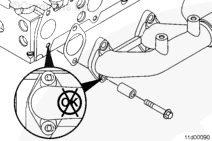
Apply a thin coating of nickel-based high-temperature compound grease to the coarse threads of the manifold capscrews, after removal.
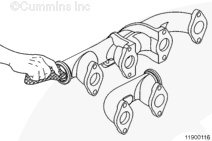
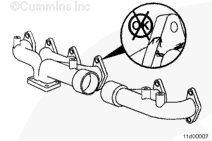
The exhaust manifold can be removed as an entire assembly. It is not necessary to disassemble the bellows and adaptor tube from the manifold before removing it from the cylinder head. When removing the manifold, both manifold pieces must be supported to minimize stress on the bellows.
Use 240-grit cloth to remove carbon deposits from the Marman flange surface. In order to clean the flange surfaces, the manifold must be disassembled by removing both v-band clamps from the bellows. Once the v-band clamps are removed, the two exhaust manifold sections can be separated. Take care not to lose the exhaust manifold adaptor tube installed within the bellows.
Inspect the exhaust manifold for cracks, soot streaking, leaks, and burnout.
NOTE: If the exhaust manifold is damaged, check the charge air cooler. A damaged charge air cooler can cause progressive damage to the exhaust manifold. Refer to Procedure 010-027 in Section 10.
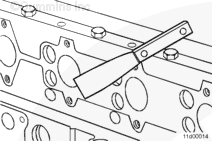
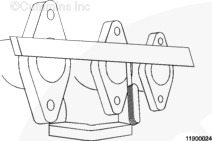
Measure the manifold surface for flatness. Place a ruler over all exhaust ports in the manifold. Measure, with a feeler gauge, the gap between the port surface and the ruler.
Exhaust Manifold Flatness
mm
in
0.20
MAX
0.008
If any port measures out of specification, replace the manifold.
Check the manifold to cylinder head fit. If the manifold mounting capscrew holes do not line up with the tapped holes in the cylinder head, replace the exhaust manifold.
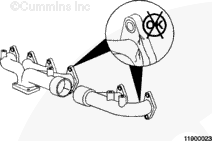
Slide the two v-band clamps over the Marman flanges of the exhaust manifold halves.
Slip the adaptor tube into the pilot port of the longer exhaust manifold half.
Slide the bellows onto the shorter exhaust manifold section.
Carefully bring the two exhaust manifold halves together so the adaptor tube is secured firmly between the two pilot ports of the manifold sections and so the bellows is secured firmly to the flanges and tighten the clamps so that they can be just barely rotated.
Batteries can emit explosive gases. To reduce the possibility of personal injury, always ventilate the compartment before servicing the batteries. To reduce the possibility of arcing, remove the negative (-) battery cable first and attach the negative (-) battery cable last.
Hello, I'm Jack, a diesel engine fan and a blogger. I write about how to fix and improve diesel engines, from cars to trucks to generators. I also review the newest models and innovations in the diesel market. If you are interested in learning more about diesel engines, check out my blog and leave your feedback.
View all posts by Jack
 WARNING


;)
;)
;)
;)
;)
;)
;)
;)
;)
;)
;)
;)
;)
;)
;)
;)
;)
;)
;)
;)
;)
;)